
Follow along with step-by-step photos to make this easy candied orange peel recipe! It's a great way to prevent food waste by turning the scraps of an orange into homemade candy. Use this candied peel in your favorite baked goods, dip the peel in chocolate for a sweet, zesty treat, or give it as homemade gift for the holidays!

What is candied orange peel?
In case you've never heard of candied orange peels before, they're exactly what they sound like: strips of orange peel that have been cooked in a simple syrup til they're soft and chewable, and then (optionally) rolled in sugar for an extra sweet finish. They have a strong orange flavor that really shines in baked goods like bread and scones, but taste equally good on their own (especially dipped in chocolate!).
If you've made my candied lemon peel, you'll notice that the process for making candied orange peel is nearly identical. It takes a bit of time, but it's actually an easy, largely hands-off project. And you'll only need the most simple ingredients: oranges, water, and granulated sugar.
So, are you ready to do this? Let's dive in!
Jump to:
How to make Candied Orange Peel
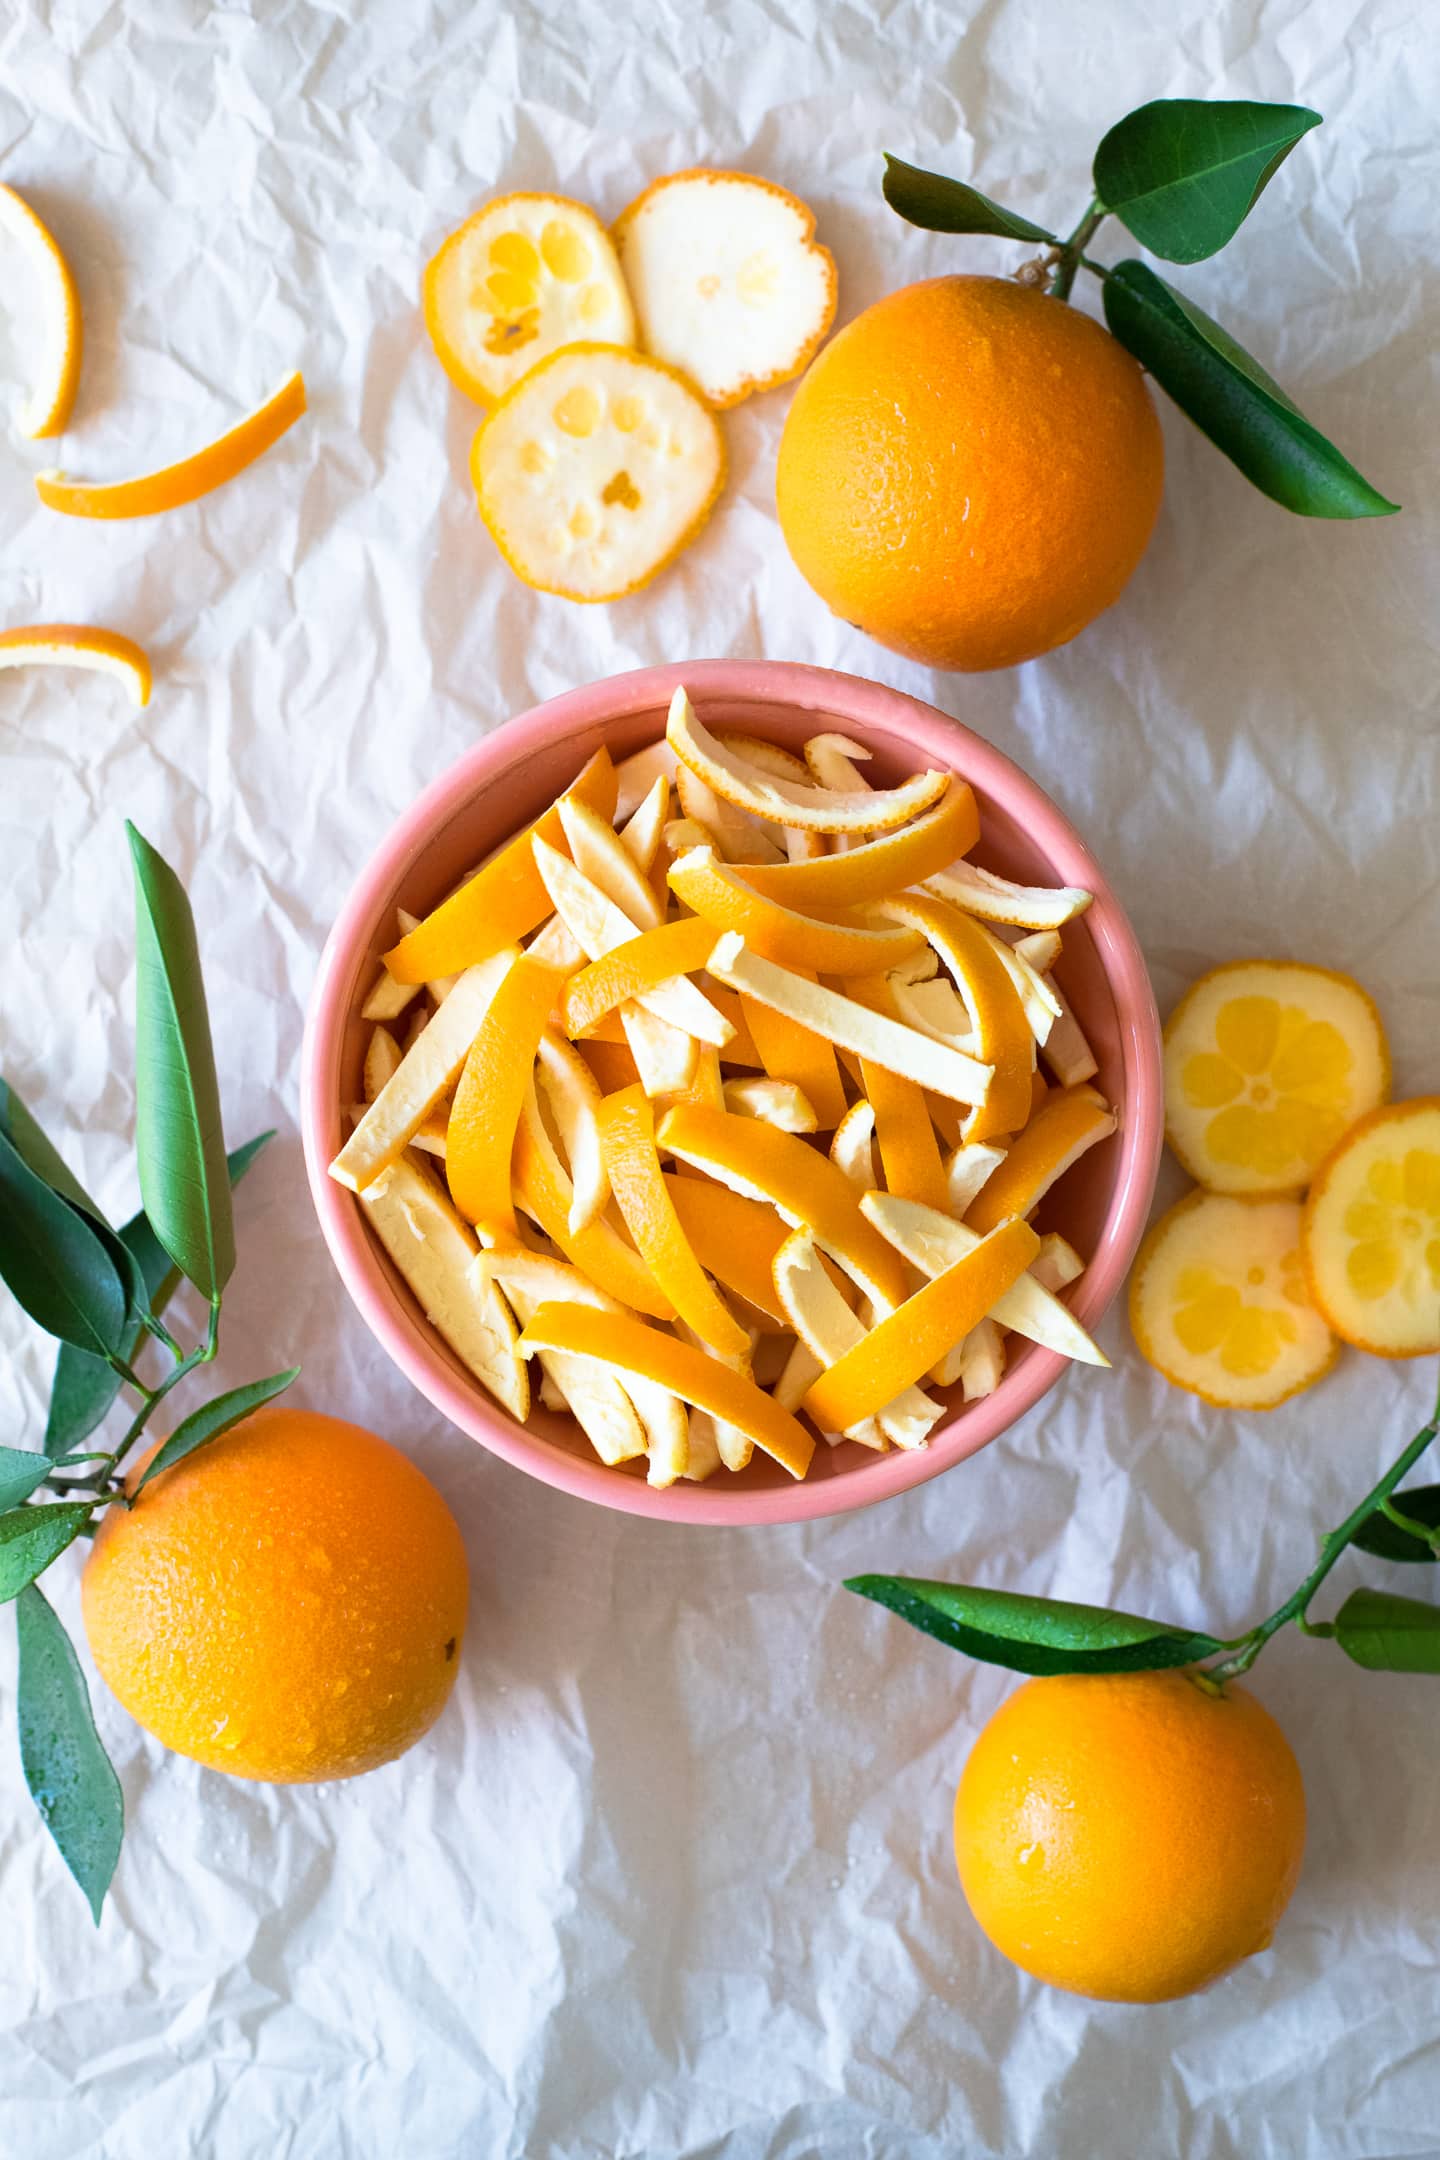
To begin, rinse three oranges. I'm using navel oranges here, but any variety will work! (You can also use more than three, like I did for these photos, but you'll want to increase the other ingredients accordingly.)

Cut the top and bottom off each orange and score the skin into quarters.

Remove the skin (both the orange zest and pith - the white part), and cut into ¼" wide strips. Wrap the oranges in plastic wrap to store for other use.
Place the orange peel strips in a medium saucepan and cover with cold water.
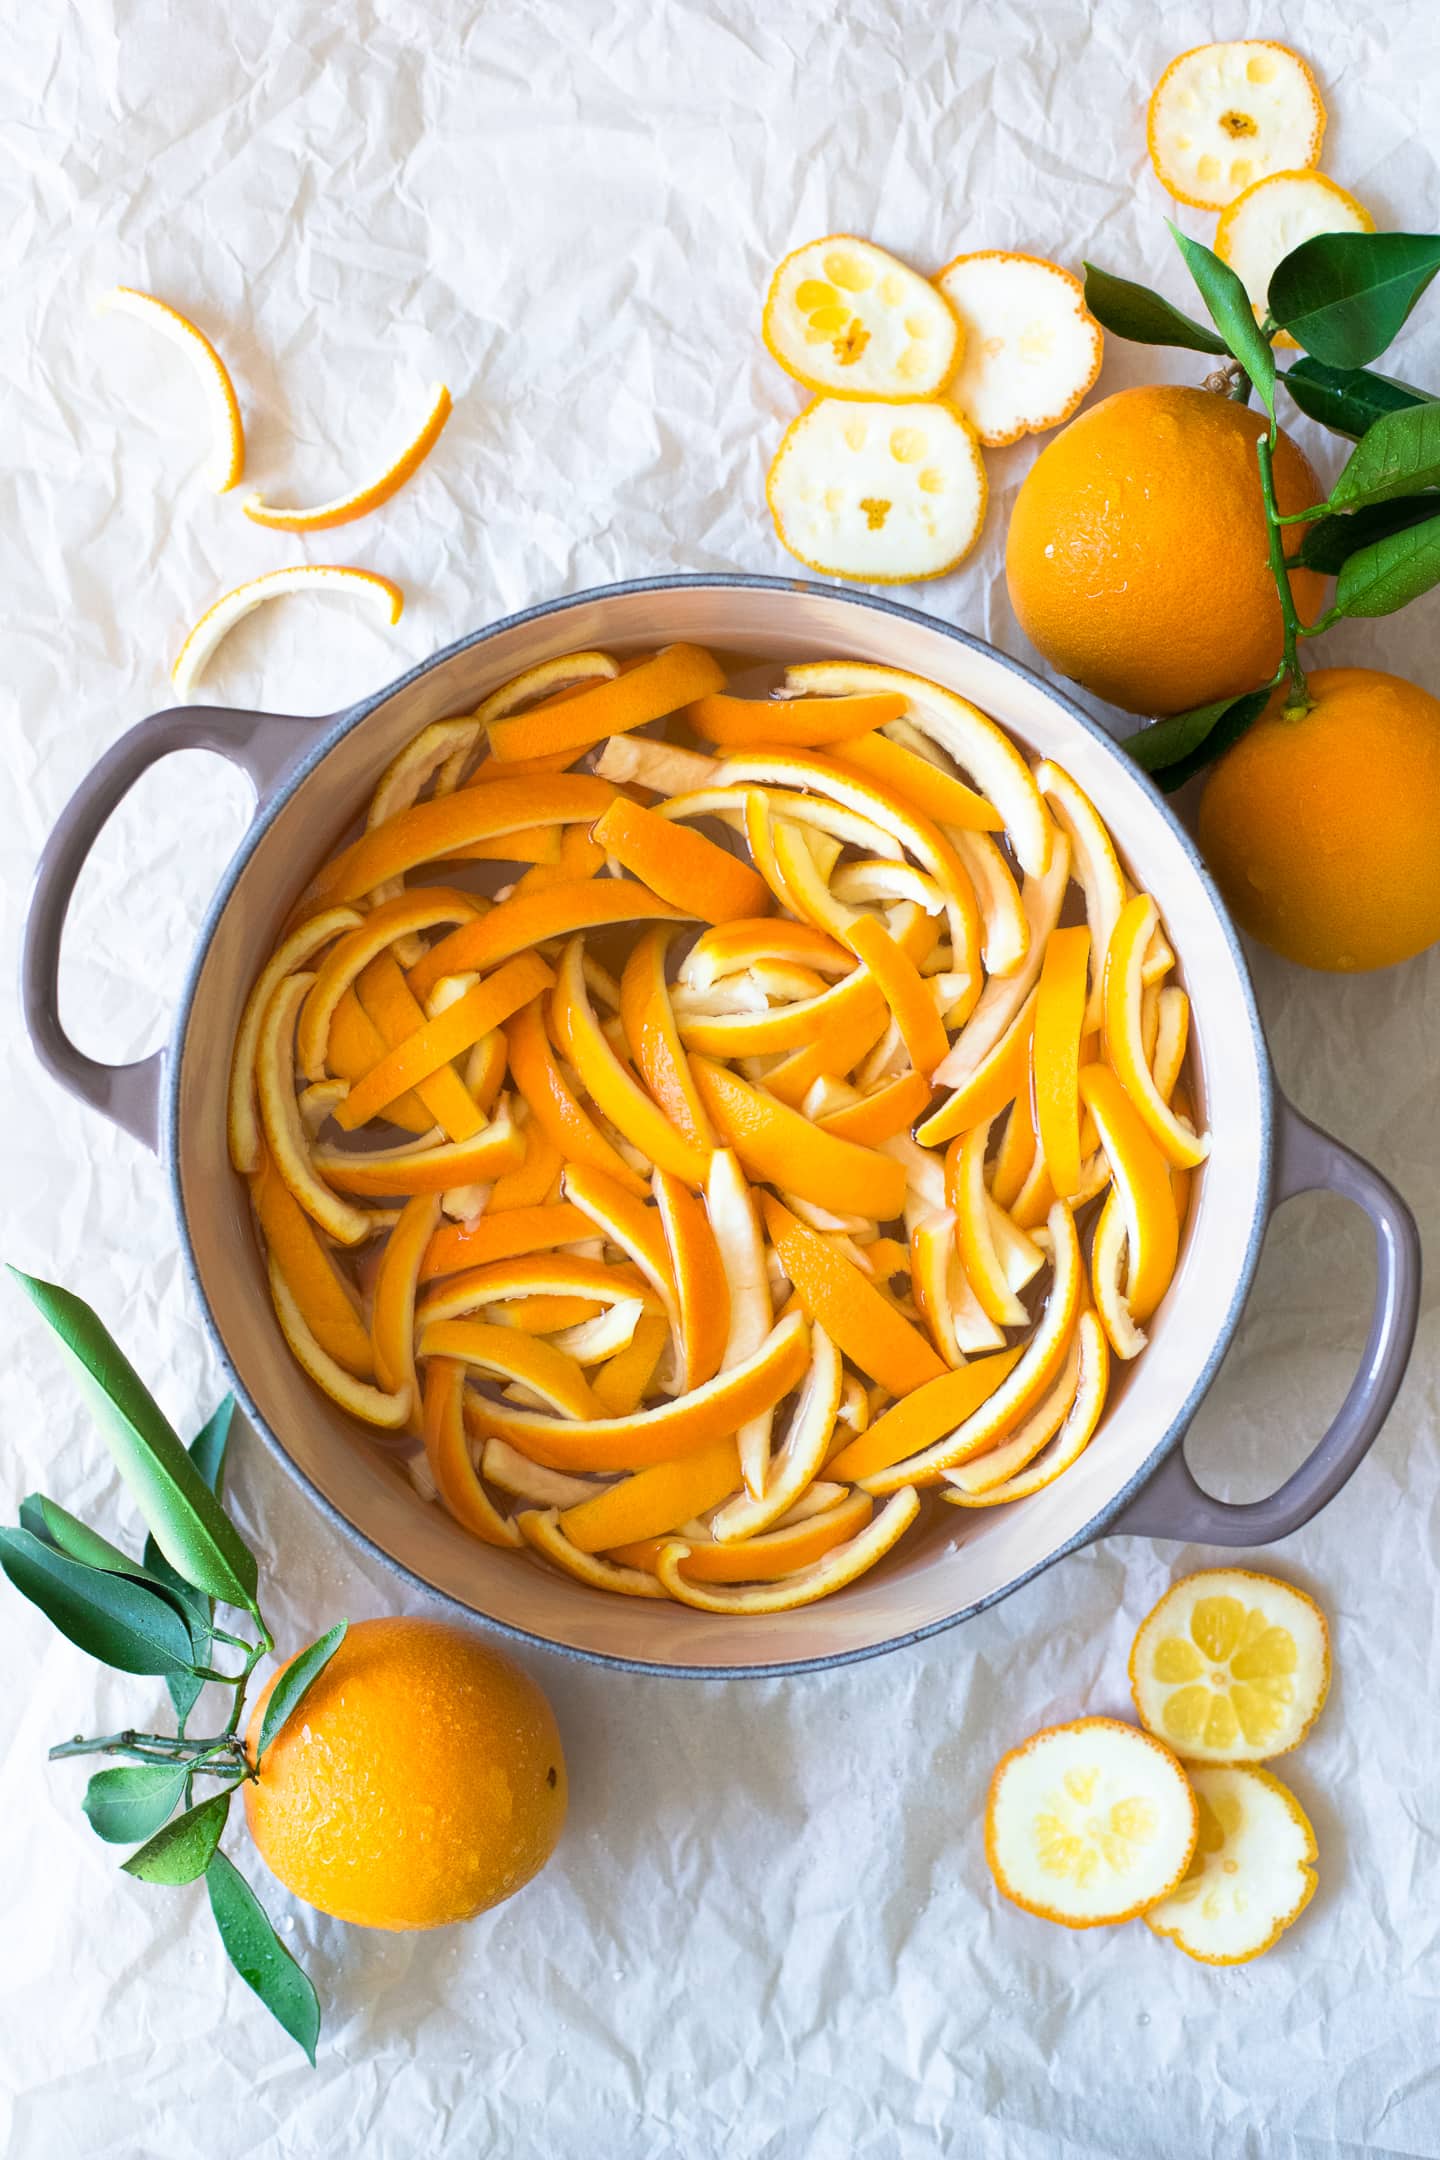
Blanch the peels: Set the saucepan on the stove over high heat and bring to a boil. Once boiling, drain the water from the peels. Cover with fresh water and repeat this process at least twice more.
This blanching process removes the bitterness that orange peel naturally has. If you're concerned about your candied peel being bitter, you may want to blanch the peels anywhere from 4-5 times to ensure no bitterness remains. Once done, drain the water for the last time and transfer the peels to a bowl while prepping the sugar syrup.
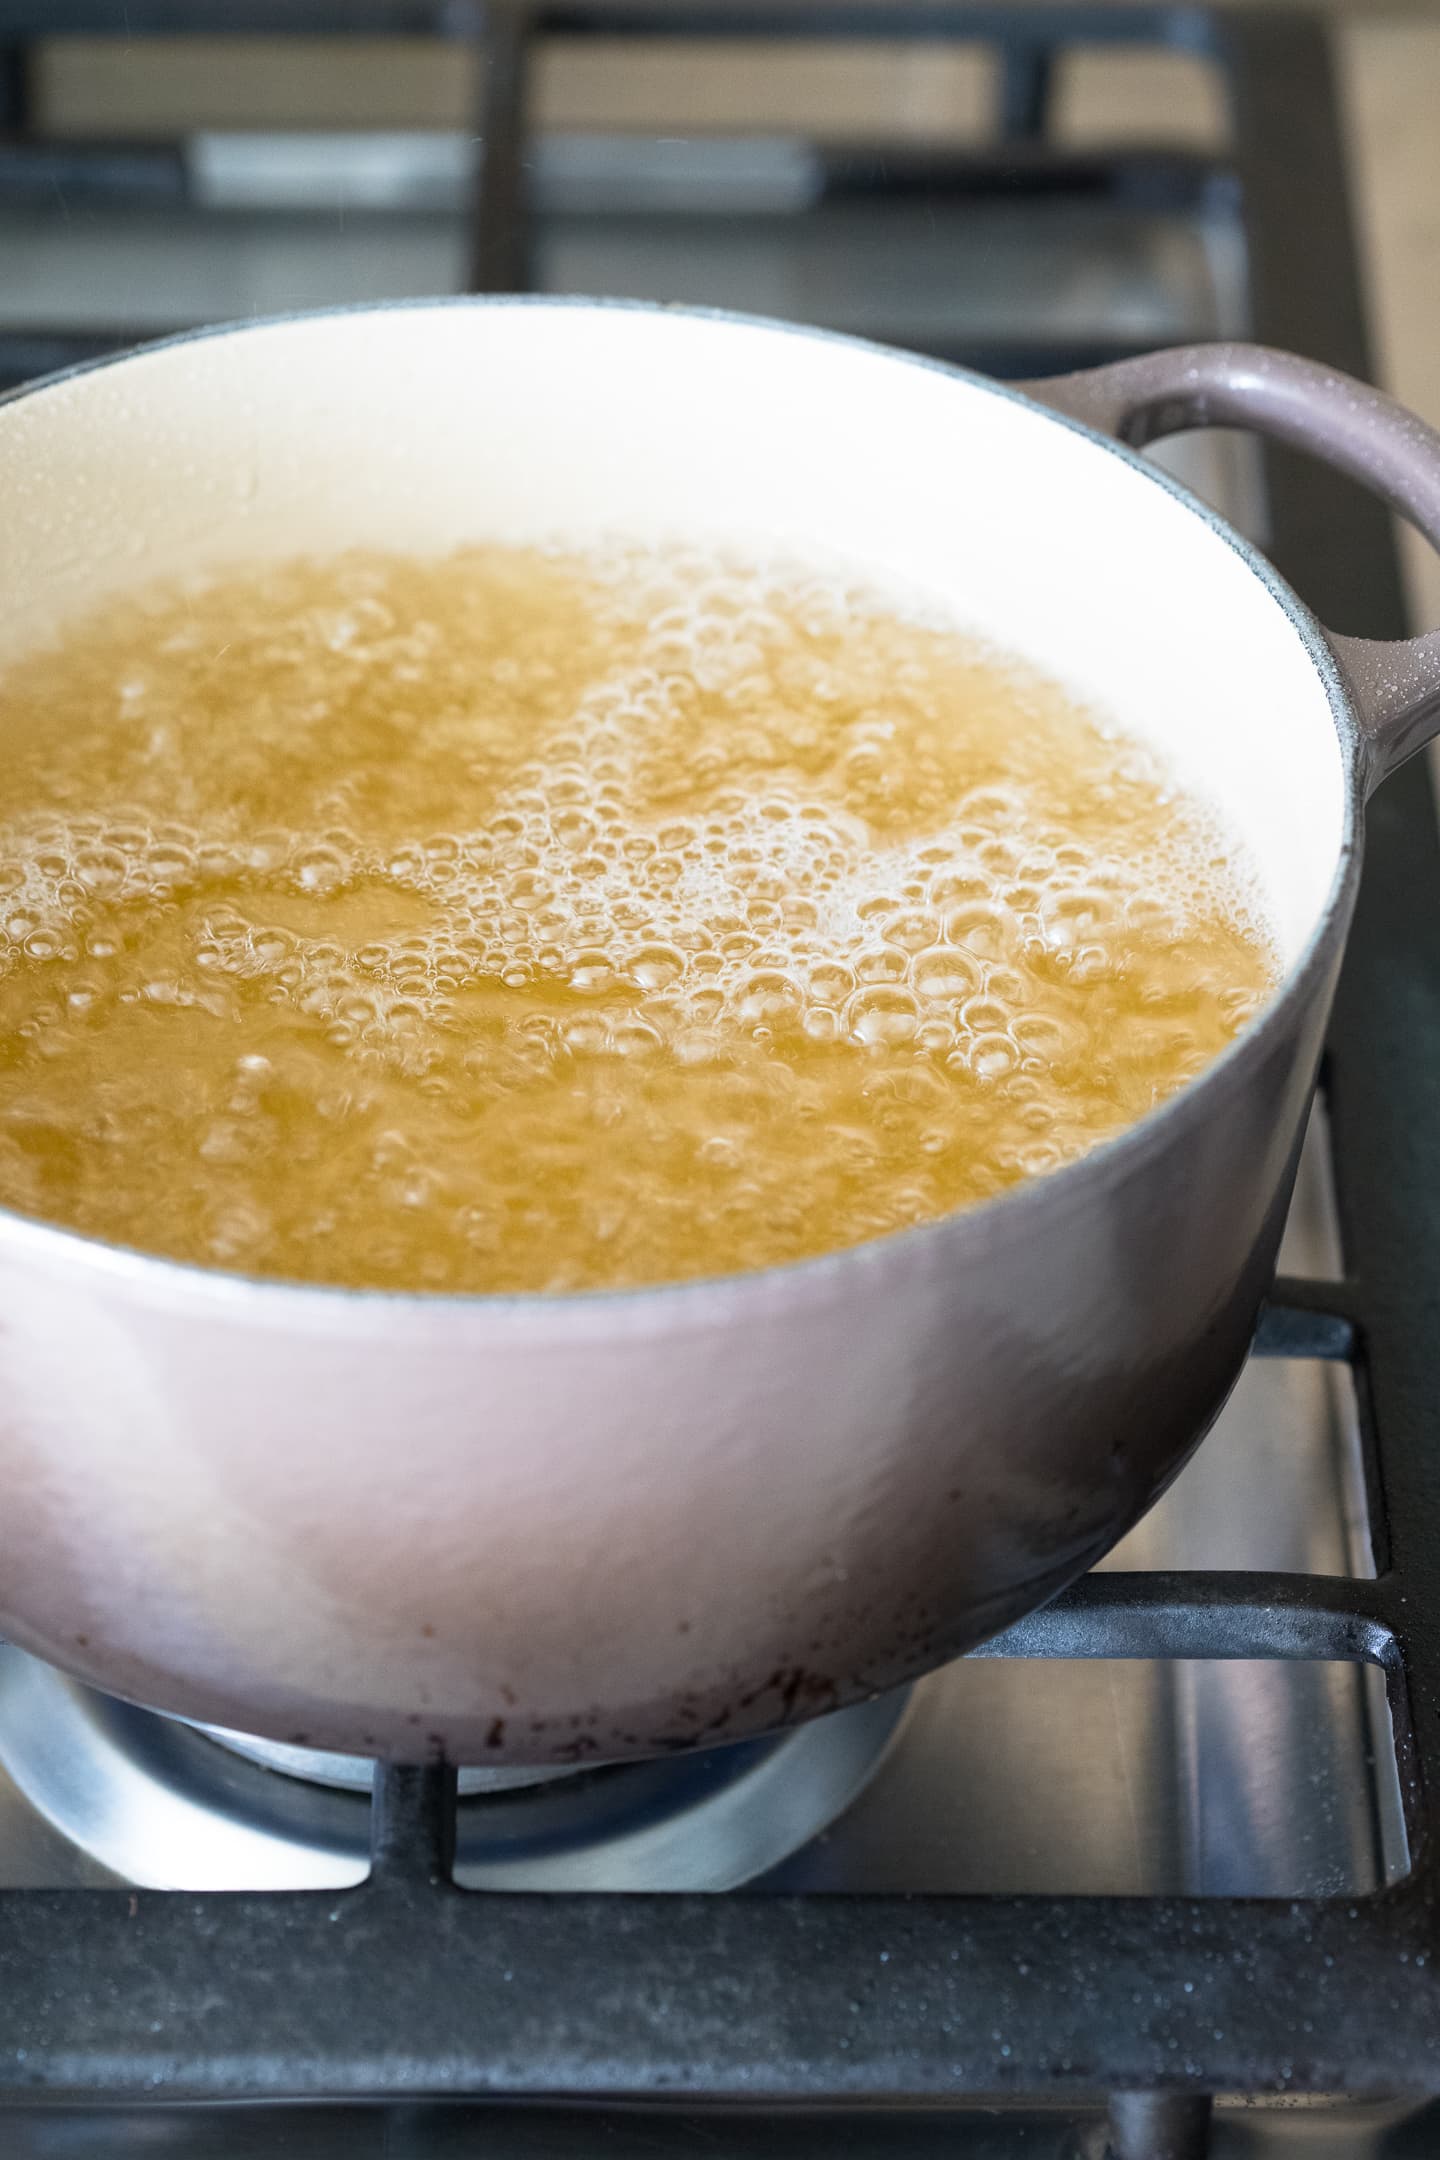
In the same (now empty) saucepan, whisk together 2 ¼ cups of granulated sugar and 1 ⅛ cups of water.

Return the saucepan to the stove and bring the mixture to a simmer. Let the mixture cook for 8-9 minutes at a constant simmer, adjusting the heat as needed to make sure it doesn't boil. It should reach a temperature of about 230°F-235°F if measured with a kitchen thermometer, which is considered the "thread stage" of candy-making.
Note: I've made this candied orange peel recipe many times without using any sort of candy thermometer, so if you don't have one, don't fret!
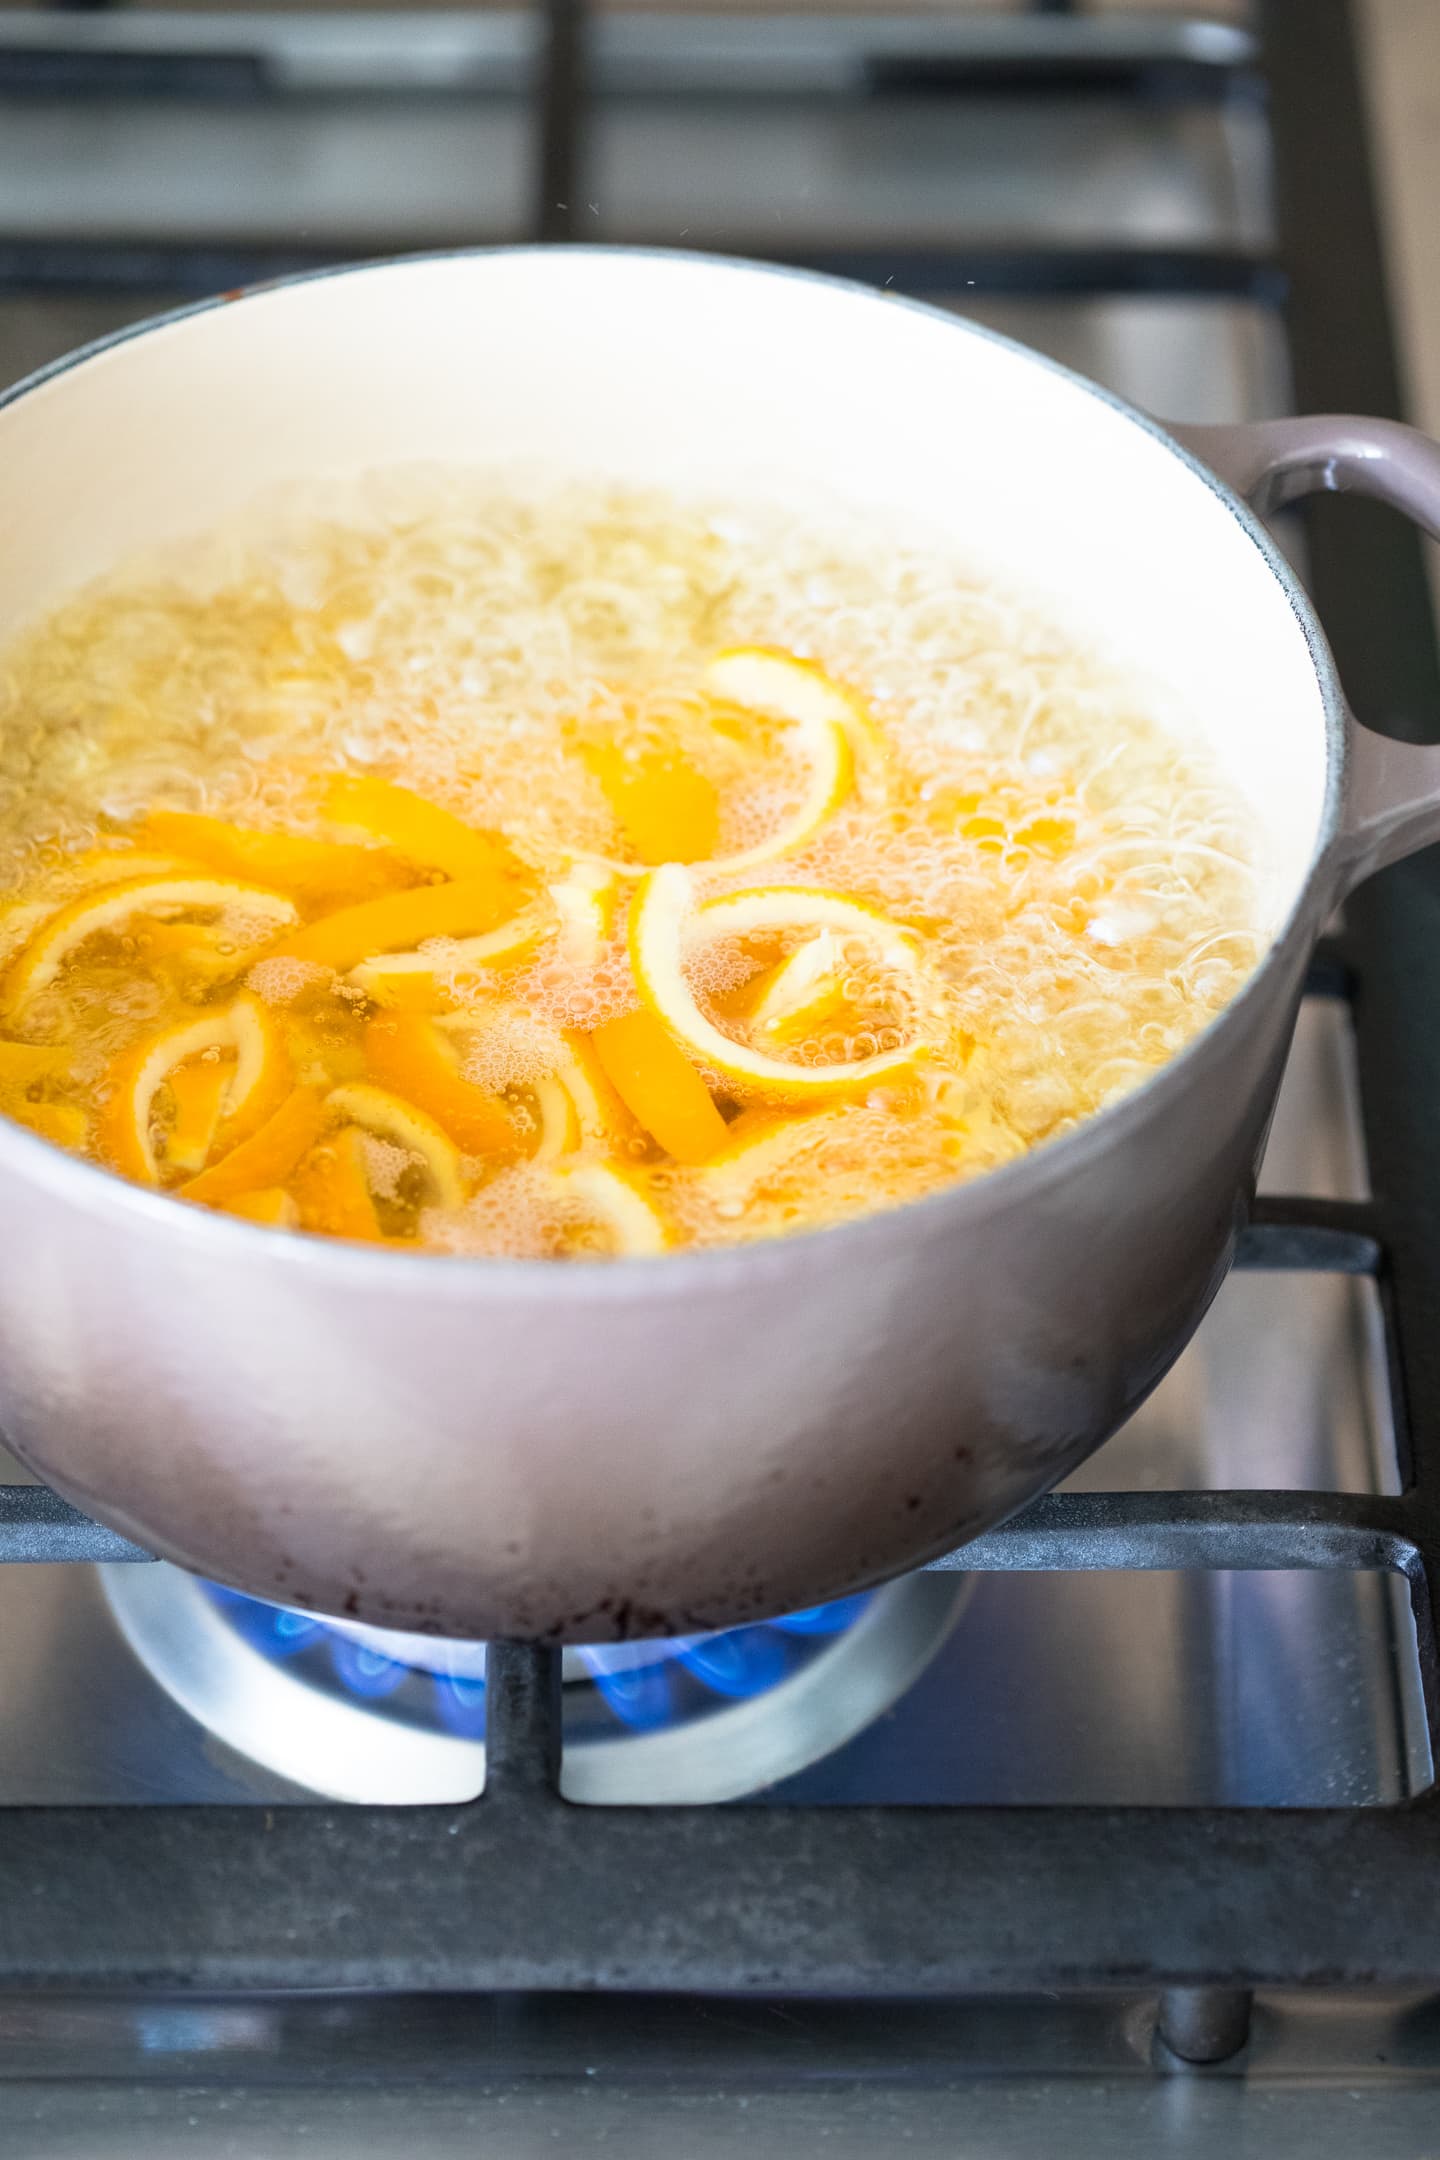
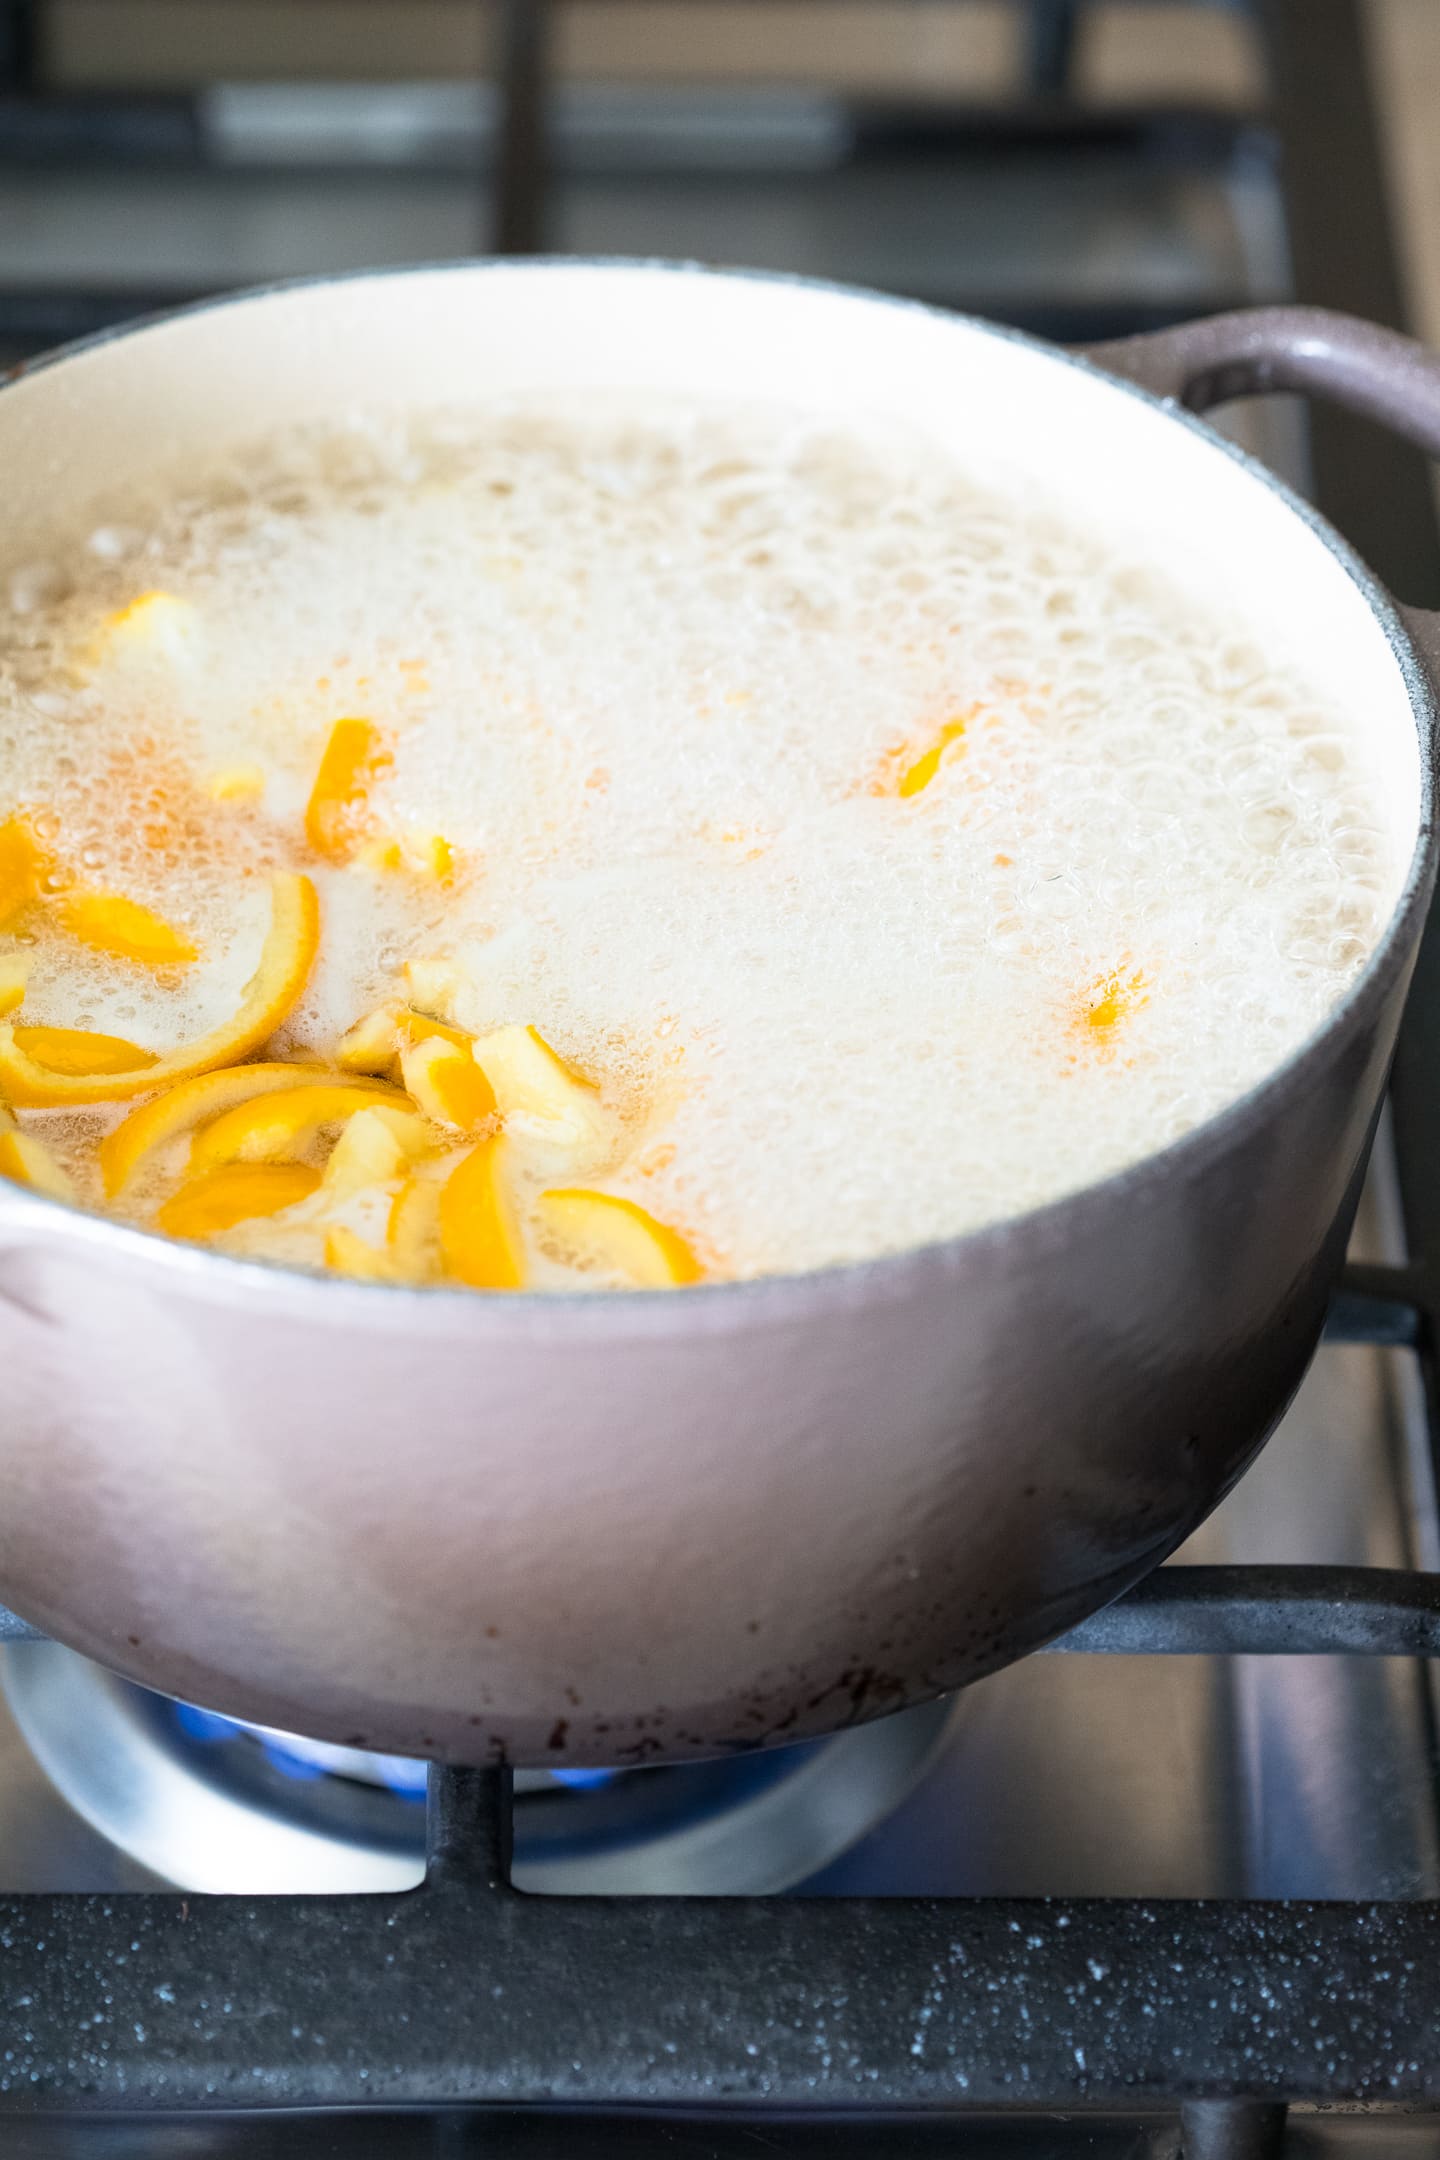
Add the orange peel and cook just until the whites (pith) are fairly translucent, adjusting the heat as necessary to maintain a simmer and prevent boiling. For me this takes about 45 minutes to 1 hour on medium-low heat, but since every stove and pan is different, it's a good idea to check on them every 10-15 minutes.
If necessary, swirl the pan occasionally to make sure that all of the peels get covered with syrup. Avoid stirring, as this will cause crystallation.
(Note: In the below photo, the syrup was just on the edge of getting too hot and starting to boil. You'll want to keep the simmer slightly lower.)
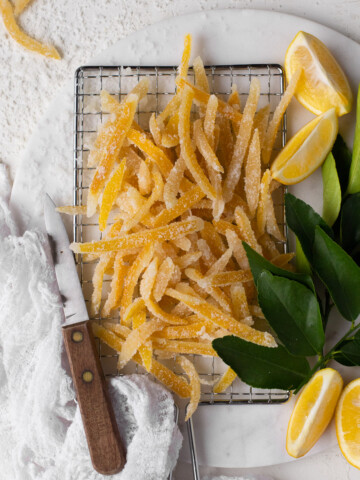
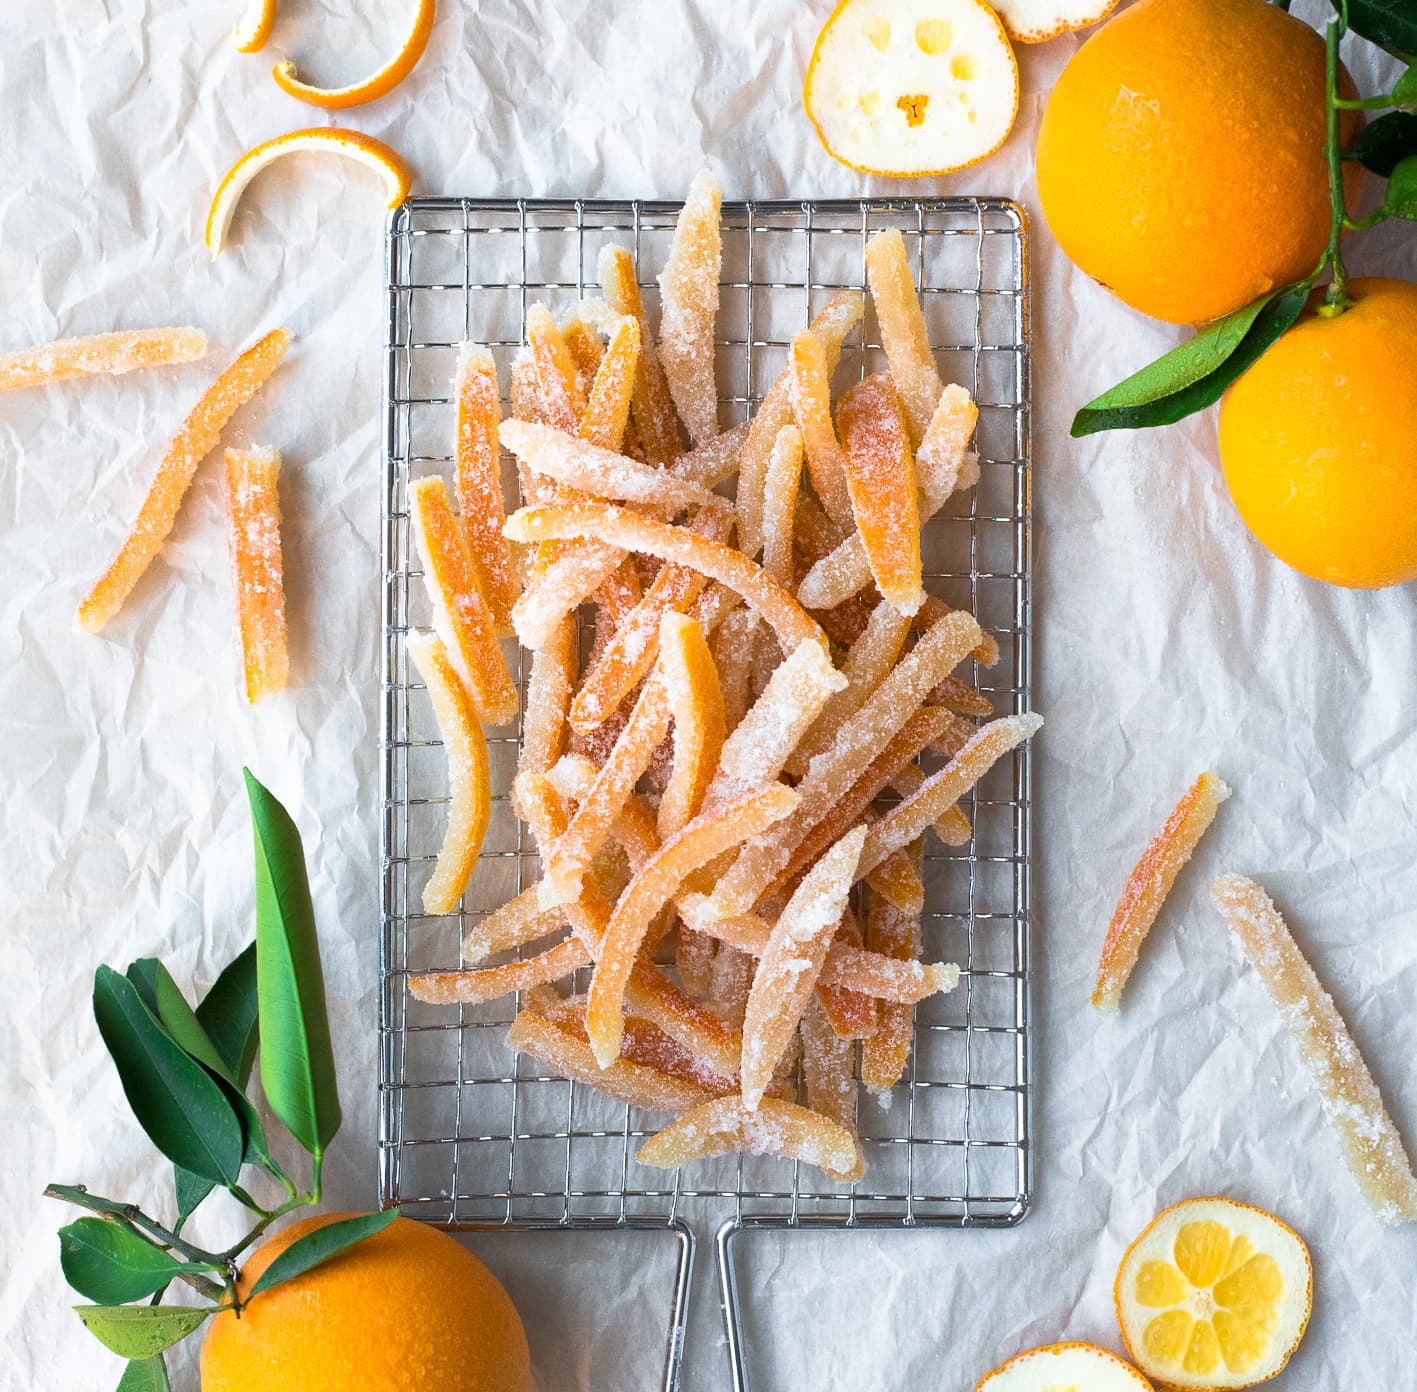
Drain remaining syrup from the peels (or remove the peel from the syrup with a slotted spoon) setting the excess syrup aside for another use if desired. Toss the candied peels in a bowl of sugar to coat (optional), and then spread out in a single layer on a drying rack to dry. This can take anywhere from 3-5 hours, depending on your environment. Once dry, store in an airtight container at room temperature.
For even more of a special treat, you can also dip them in melted dark chocolate once they're dry to make chocolate-covered orange peels!

How to use candied orange peel
Candied citrus peels of any sort are great for using in baked goods like sweet breads, scones, cakes, and cookies. They're often added to Italian florentine cookies and pannetone, German stollen, and fruitcake. They'd be a fantastic addition to these raisin cinnamon rolls!
You can also use this candied peel as a garnish on cakes and cupcakes, salads, and cocktails (like the classic Old Fashioned).
And of course, you can simple enjoy these on their own as a sweet treat! They're especially great for snacking when they're dipped in chocolate, and make a great gift during the holidays.
Common questions about this recipe
When stored in an airtight container in a cool, dry place, this candied peel should stay fresh for several months. Refrigeration isn't required.
The pith of all citrus peel is naturally quite bitter, which is why it's important to blanch your peel before candying it. If you find that your candied peel is too bitter for your tastebuds, try blanching it more next time.
Once the peel has been candied and briefly cooled, twist each piece around a toothpick or straw to curl it. Let it dry this way, and then store as usual.
Ready to make more candied treats?
Try one of these recipes next!


Have you made this recipe?
If so, I'd love to hear your feedback; you can leave a rating and review in the comments section below! It's also so helpful if you help spread the word by sharing this post on your favorite social media channel. If you happen to snap a photo of what you've baked, be sure to share it on Instagram and tag me (@brighteyedbaker) so I can give you a shoutout!
Recipe Card

Candied Orange Peel
Ingredients
- 3 oranges preferably organic
- 2 ¼ cups granulated sugar plus extra for rolling
- 1 ⅛ cups water
Instructions
- Rinse the oranges. Cut the top and bottom off each and score the skin into quarters.3 oranges
- Remove the skin (both the peel and pith - the white part), and cut the skin into thin strips about ¼″ wide. Wrap the oranges in plastic wrap to store for other use.
- Blanch the peels: Place the strips of peel in a medium saucepan and cover with cold water. Set the saucepan on the stove over high heat and bring to a boil. Once boiling, drain the water from the peels. Cover with fresh water and repeat this process at least twice more. (This removes the bitterness that orange peel naturally has; you may want to blanch the peels 4-5 times to ensure no bitterness remains.) Once done, drain the water for the last time and transfer the peels to a bowl while prepping the sugar syrup.
- In the same (now empty) saucepan, whisk together the sugar and water. Return the saucepan to the stove and bring the mixture to a simmer over medium-low heat. Let the mixture cook for 8-9 minutes at a constant simmer, adjusting the heat as needed to make sure it doesn't boil. If you own a kitchen thermometer, the syrup should reach about 230°F-235°F, which is considered the "thread stage" of candy-making.2 ¼ cups granulated sugar |1 ⅛ cups water
- Add the orange peel to the syrup mixture and cook just until the whites (pith) are fairly translucent, adjusting heat as necessary to maintain a simmer and prevent boiling. For me this takes about 45 minutes to 1 hour on medium-low heat, but every stove and pan is different so it's a good idea to check on them every 10-15 minutes. If necessary, swirl the pan occasionally to make sure that all of the peels get covered with syrup. Avoid stirring, as this will cause crystallation.
- Drain remaining syrup from the peels, setting aside for another use if desired. Toss the peels in a bowl of sugar to coat (optional), and then transfer to a wire rack to dry (usually about 3-5 hours). Once dry, store in an airtight container. These keep well for at least a few months in a cool, dry place.
Notes
Nutrition
Nutrition information is an estimate per serving, calculated using standard ingredients. Actual values may vary based on brands used, measurement methods, and more.


Michele
I use cutie oranges. The skins are softer. Delicious
Alexandra Azary
Yum! Great idea. :)
Olivia
Hello, is it possible I could reuse the syrup to make more candied orange peel?.. Or would that turn out bad? Thank you!
alexandra
I haven't tried it but I don't think I'd suggest it. You can use it for other purposes - add it to tea, use it as a sweetener in a recipe or as part of a glaze for a cake, etc. But I would start with fresh syrup for each batch of candied peel.
Jean
I make lots of candied orange peel for panettones and this is a good recipe. One thing u can do to prevent crystallization is to add a tablespoon or so of corn syrup with the sugar. Also if u would like to add more flavor instead of using water u can use orange juice for some or all the water. Since I use for panettone instead of rolling in sugar, I cut up into squares before cooking, then when they are done I pour the whole thing including syrup into a jar and keep in the refrigerator.
alexandra
These are great tips! Thank you for sharing!
Reina
I have made this recipe and I loved it, I used the peels to add to an orange cranberry cake, delicious! Thank you and I am ready to make the orange candied again
alexandra
So happy to hear that you're enjoying this recipe. :) That cake sounds delicious!
Beata
Hi there! This looks marvelous! If I wanted to sub white sugar with coconut sugar, what amount would you say I shall use?
alexandra
Hello! I haven't tested this recipe with coconut sugar so I can't make any promises as to how well it will work, but if you want to try it, I would use an equal amount of coconut sugar in place of the granulated sugar. I'd love to hear how it goes! :)
Inger
Thank you for the temperature into. I once accidentally made candied orange slices that were glossy and pliable--and simply amazing. But my recreation attempt failed. I realize that many of the online instructions are not getting the sugar to the right stage but wasn't quite sure what that would be.