
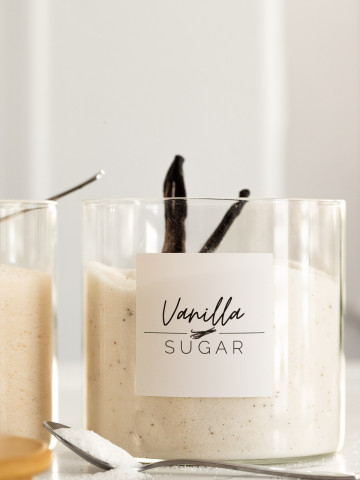
One of my favorite things in the world is caramel. Caramel candies, caramel ice cream, caramel chocolates, caramel iced lattes, caramel sauce... please give me alllll the caramel, thank you. Apparently, there are a lot of you out there who feel the same (we're kindred souls) because my DIY caramel sauce recipe is consistently one of the most popular posts on this blog. It makes me so so happy to know that you guys love it as much as I do. :)
If you check out that post - which you should definitely do because it just mightttt be the caramel sauce that changes your life - you'll notice that there's a LOT going on in it. There's some preliminary caramel-make tips + a super-detailed recipe + a million and one back-and-forths with readers who have asked questions, tried it, loved it, and overall helped make it a post overflowing with caramel-making wisdom and caramel-loving enthusiasm. The fact that we can all share our knowledge and obsession with caramel is crazy-cool to me. Since I've talked to so many of you about this recipe over comments and made this sauce more times then I can possible count since I first published that post, I thought it might be helpful to share some of my top things-you-should-know-about-making-caramel tips, so that you a) don't have to scroll through 200 comments to find the answer to your question, and b) will be extra-convinced that this caramel needs to happen in your kitchen ASAP.

10 Things You Should Know About Making Caramel the No-Cream Way
1. You CAN make caramel sauce with milk. That's the BIG BIG BIG thing here - you really don't need cream or butter to make an incredible caramel sauce. I usually use 2% milk, but I've had readers try 1%, skim milk, rice milk, almond milk, soy milk, goats milk, and other lactose-free milks like Lactaid and tell me that they do indeed all work. Yay!
2. Patience is your friend. I guarantee I'm not the most patient person in the world, but when it comes to making caramel, you just need to go into zen mode and summon that patience from somewhere. It takes time for the sugar to liquify, it takes time to fix your caramel if it seizes, and it takes time to cook your caramel down if you want it thicker, but I promise you, it will happen. Don't try to rush things because when it comes to making caramel, *everything* is about that perfect balance.
3. Watch your heat. That balance thing I mentioned? Here's where it comes into play. Basically everything about the caramel-making process is temperature-sensitive. Usually you'll want your stove around medium-low heat, but every stove is different. It should take about 10-15 minutes for your sugar to liquify (the first step in making dry-method caramel). If it happens much faster, your stove is probably running way too hot and you might burn your sugar and/or curdle your milk. NO FUN. On the other hand, if you're sitting at your stove for half an hour and still staring at a pot of white sugar, kick the heat up a little bit. Once you know what exact temperature works best for your stove, making caramel will be much less of a guessing game.
4. Don't almost-burn the sugar. And definitely don't burn it! When you're making caramel, you're looking for the sugar to turn a rusty golden-brown color before you add your milk. If you don't take it to that point, you won't have a rich, complex caramel sauce, but you don't want to verge on burning it either. If you do (burn it), it's going to taste burnt no matter what you do, and it will lose that creamy sweetness that makes caramel so addicting. But even if you don't burn it, getting the sugar too dark can make it too acidic, and as soon as you add that milk, you could have a curdling problem on your hands. Again ------> not fun.
5. Just keep stirring. I've said this a million times, but it deserves to be said again, because there will always be that person who freaks out when they add the milk and the sugar seizes up into a rock. I'm not saying it's going to happen, but if it does, it's normal! Don't give up. :) All you need to do is put the caramel back over medium-low heat, stir, stir, stir constantly, and wait for that sugar-rock to liquify again. Remember that thing about patience? This is where you might need it. But whatever you do, keep stirring - unless you want your milk to get too hot and curdle, at which point your caramel sauce will turn out looking like a not-so-sweet chunky mess.*yuck*
6. Don't be a perfectionist. I actually mean this in more ways than one, because making your own caramel sauce is not always the easiest thing to get right on your first try and if you let one not-so-perfect attempt get you down, you're just making things harder than they need to be. Some of you have told me that you made 3 or 4 batches in a row before you got it down, and I am always soooo thrilled to hear about that kind of determination. The other thing I mean about the perfectionism thing is a little more of a life-hack. If you can't quite get all that seized sugar to melt again, and you still have a few small pieces floating around in your caramel, it's all good. Instead of standing there for another who knows how many minutes stirring the caramel, just turn the stove off and let the caramel sit for a while. Chances are the heat still in the pot will make that last bit of sugar melt, and if it doesn't, so what? Strain it out and call it candy. :)
7. There's more than one way to make a thicker sauce. The basic rule of thumb for this caramel sauce is that the longer you cooking it after you add the milk, the thicker it will end up. BUT, there are ways to shortcut this process. Instead of using the full amount of milk stated in the recipe, reduce it to 1 cup or even ¾ cup. By using less milk for the same amount of sugar, you'll have a thicker batch of caramel sauce without having to cook it down as long. (If you really want to make things easy, you can also just use cream and you'll have a gorgeous, thick caramel without having to cook it down much at all.)
8. A curdled sauce isn't a ruined sauce. If you follow all the rules as best as you can and you caramel sauce still curdles - because life happens - don't dump it!! An immersion blender works magic on caramel to make it silky-smooth again.
9. It's adaptable. I can tell you with experience that it's hard to double this recipe and get it right, but you can definitely half it without an issue. Plus, you can totally have fun with it at the end by mixing in your favorite spice or extract for a little something different - think vanilla bean, cinnamon, or even a dash of cayenne powder! Don't be afraid to make it your own!
10. You can use it for everythinggggg. Once you get this recipe down, it can literally be your base for any type of caramel-making endeavor you want to take on. Make it thinner to use as a base for caramel ice cream, or thicker to drizzle onto your favorite dessert as a garnish. It can literally go any which way. And you guys, you continually amaze me with your creative and drool-worthy ways to use this sauce. ShellyMarie made it to pour on Apple Cinnamon Rolls, Melissa put it on Pumpkin Pie, Kelli B put it on a spiced apple cake, Sara served it with panna cotta, Tiffanie used it for dipping apples, Bree added it to vanilla ice cream, Mary used it to top her cheesecake, Heather drizzled it on popcorn, Treena made it for banoffee frappés, Kassie made salted caramel mochas, Tracy Michaels served it with a sweet potato panna cotta AND apple pie burritos, and Scotty used it for his lattés. This makes me SO happy.
P.S. If you make my caramel sauce, I'd love to see you snap a pic and share how you used it! Tag me on Instagram so I can see what you come up with!

Dorina
Wowww!! Best baking hack ever! My caramel curdled and I was just about to do another batch but I googled how to fix it. I tried a couple of things that didn't work and then I tried the blender like you suggested! It's fixed!!! Thank you soooooo much!!!
alexandra
That's awesome to hear! Glad you didn't end up having to waste any ingredients. :)
Nir
is there anything I can do to lower the sweetness of my caramels? many home made recipes are too sweet for me.
alexandra
My suggestion would be to cook the caramel just to the edge of being burnt without actually burning it. This might take practice but if you're familiar enough with a recipe, you should be able to gauge just how hot you can get the sugar before it gets burnt. This way, you'll get more of that intense butterscotch flavor that will take away from some of the sweetness.
Nir
Okay I'll try that next time, thanks! do you know roughly what temperature it should be around? If i remember correctly sugar caramelizes ~330- 350 F +/- a few degrees depending on elevation etc. so should I leave it longer in that area or raise it past the 350 F?
Jorge Bizarro
Hi Alexandra
I've submitted one of the 200 and so comments mentioned above... but now decided to post this one here because I can confirm that the stick blender will solve the curdling issue.
Now, my first post coming from my first try of DiY Caramel is about getting it 'grainy' because I did use a bit of brown sugar. So that was cause by acidity from that type of sugar.
Than I did a 2nd and 3rd try with normal caster sugar and it seemed to work in the beginning but I ended up this time with a 'flecky' (not grainy) sauce, still much better than the first one in terms of texture. I did add a tsp of butter in the end for taste and I suspected the butter might have done it. Exactly like the 67 years old gentleman that also added it...
The third try I got the milk hot enough to produce a skin & small bubbles and when I poured it it foamed entirely in such a way as to look like incredible whipped egg whites... just to go back to 'normal'. Also, I use UHT wholemilk because that is what I have available here in the rural outskirts of Rio. So I think this curdling is not due to sugar cristalizing, but to milk protein clumping. For me final culprit is heat. I like a thick sauce and cooking it longer, even at very low fire makes it boil anyway. So the next time:
- I'll use just slightly warm milk... sugar will seize more easily, but resulting heat will be lower
- I'll wait a bit and stir the caramel out of the stove before adding the milk for making it lower the temperature further
- butter is fat, so I don't think it has anything to do with this issue, but I'll try adding a bit more fat to this kind of milk using mild taste extravirgin olive oil... I just love it in baking.
Anyway the GOOD NEWS IS... a magic BLENDER will fix it. Mine is plastic, not metal, so I have to cool the sauce while it is still liquid, use it, and back to the stove for thickening.
I'm going to make a try using a mix of 'cofeed milk'... this will have even less fat... but also less protein.
alexandra
Thanks so much for sharing everything you've learned! You're right about the milk in that heating it too much can cause curdling. You do want it to be quite warm to prevent seizing, but you don't want to get it to a boiling point, or to the point where a skin forms.
On the other hand, I'm really surprised that even on lowest heat you're still having a problem with the caramel boiling after adding the milk. Are you stirring constantly? That's definitely necessary to prevent that.
Hopefully this gives you a little more to think about and helps you perfect your sauce! :)
connie
Why did my Carmel sauce separate??
alexandra
Were you making the caramel sauce from the blog, or did you use a different recipe? And at what point did it separate? That would help me answer your question better. :)
Pam
I have been looking for a caramel sauce made with skim milk forever! I will try this recipe tomorrow. Will let you know how it turns out, Thank you in advance.
alexandra
I hope it works out for you! :)
sathya priya
Great tips.I am looking forward to make the caramel sauce
Lindsey @ American Heritage Cooking
Great tips!!! Patience and vigilance...
I'll have to try it with milk instead of cream...then I can eat more!
alexandra
Haha yes exactly the point! :)