
This homemade, vegan dark chocolate pudding is rich, creamy, and silky-smooth, and it couldn't be easier to make! It takes less than 15 minutes to prep, and requires just 7 ingredients. Top it with dairy-free whipped cream for a quick, decadent chocolate dessert that also happens to be gluten-free and refined sugar-free!

Most of us probably grew up eating classic desserts like chocolate pudding from a boxed mix, the kind that's easy to write off as your taste buds mature. But much like a homemade chocolate cupcake is 10x better than what you'll get from the store, homemade pudding puts the pre-packaged stuff to shame.
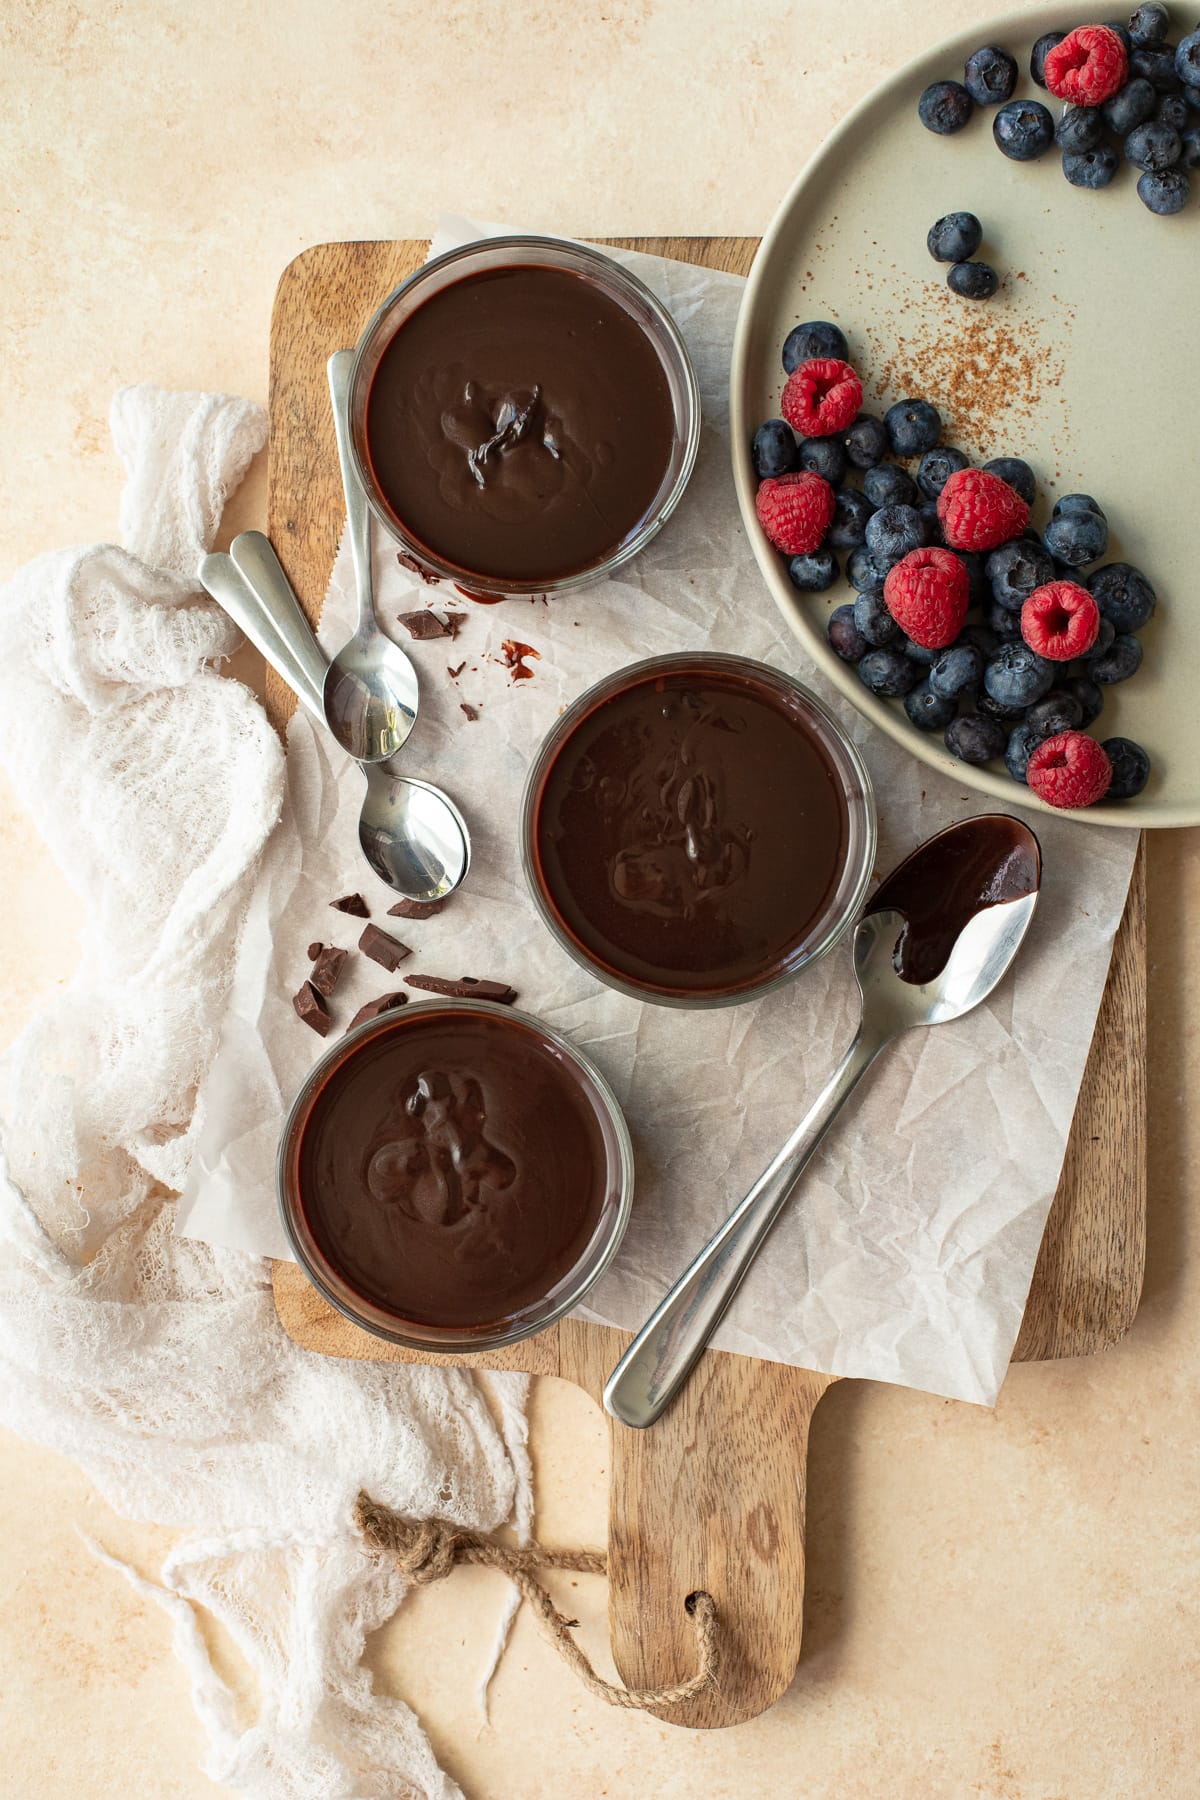
It's so simple to make from scratch, and has a rich, decadent dark chocolate flavor. Think of it as pudding re-imagined; add a dollop of whipped cream and some fresh berries and you have an elevated version of a classic.
Jump to:
Why you'll love this recipe
- It's quick and simple: prepped in one pot, with just 15 minutes and 7 ingredients.
- It's made with coconut milk rather than heavy cream and eggs, so it's dairy-free, egg-free, and vegan. It's also gluten-free and refined sugar-free, so it easily suits a variety of dietary needs, without compromising on flavor. In fact, this may very well be the best chocolate pudding you'll ever have - vegan or not!
- Since it's made from scratch with less heavily-processed ingredients, it's a healthier option than what you'll get from a package or boxed mix.
- Coconut milk (plus a little dark chocolate) naturally thicken this pudding, meaning you won't need any of the usual suspects like flour, corn starch, avocado, or tofu to nail the consistency. And in case you're wondering, you can't taste the coconut!
- It's less cloyingly sweet than packaged pudding, and more rich, creamy, and luxurious. You'd never know it though; you'll still get your chocolate fix!
Ingredients you'll need
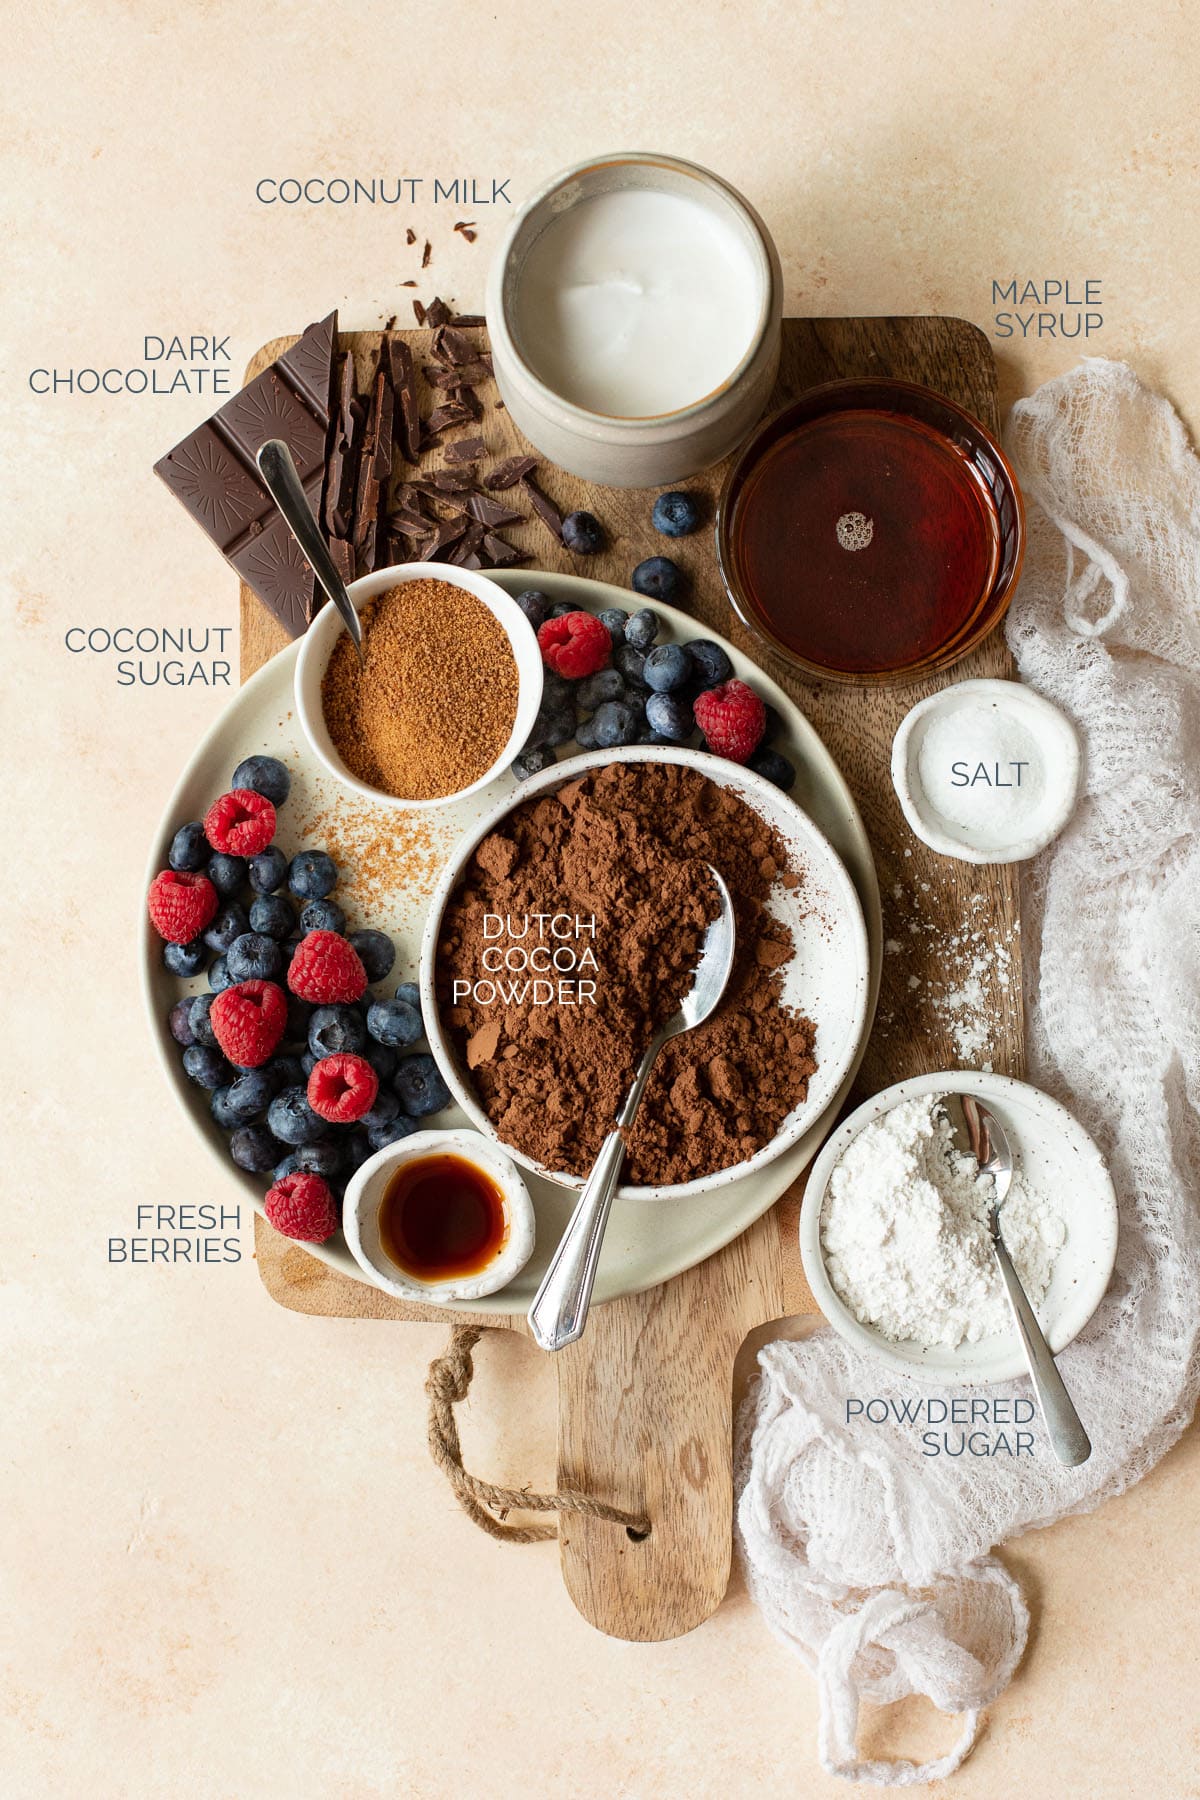
The image above includes everything you'll need to make this vegan chocolate pudding, as well as the coconut whipping cream I like to serve it with.
A few things to keep in mind:
- Use full-fat, canned coconut milk - no substitutions! Your pudding won't thicken without it. You'll also need separate cans of coconut milk for the dairy-free whipped cream, and these should be refrigerated for at least 24 hours prior to using them. For this recipe, I'd recommend buying 6 small (5.46 fl oz) cans of coconut milk, and refrigerating 2 of them for the coconut whipping cream.
- Maple syrup can be substituted with agave syrup; either option works to naturally sweeten this dessert.
- Use a good-quality dutch cocoa powder, as well as good-quality dark chocolate. This double dose of chocolate makes all the difference in the flavor of the pudding, so don't skimp! To ensure that this recipe is vegan, make sure your dark chocolate is also vegan. Look for one with around 70% cocoa, or use an even higher percentage to cut back on the sweetness.
- Unrefined cane sugar or brown sugar would likely work as substitutes for the coconut sugar in this recipe. You can also reduce the coconut sugar as another means of reducing sweetness.
- Use unrefined powdered sugar in the coconut whipping cream to keep this recipe refined sugar-free. While cane sugar will also work, powdered sugar dissolves better, for a smoother finished product.
Instructions
For the dark chocolate pudding:
You'll be amazed at how quickly and easily this vegan chocolate pudding comes together! It's seriously almost as easy as using a mix.
Step One - Whisk ingredients in a saucepan. Add 2 ½ cups (or about 4 small cans) of coconut milk to a medium, heavy-bottomed saucepan set to (just over) medium heat. Add the maple syrup, cocoa powder, coconut sugar, and salt, whisking everything together very well as the mixture starts to heat up. Once smooth, let the mixture come to a gentle boil, and maintain that for about 10 minutes, stirring often. At this point, it should be thick enough to coat a spoon, although it will thicken substantially more as it cools.
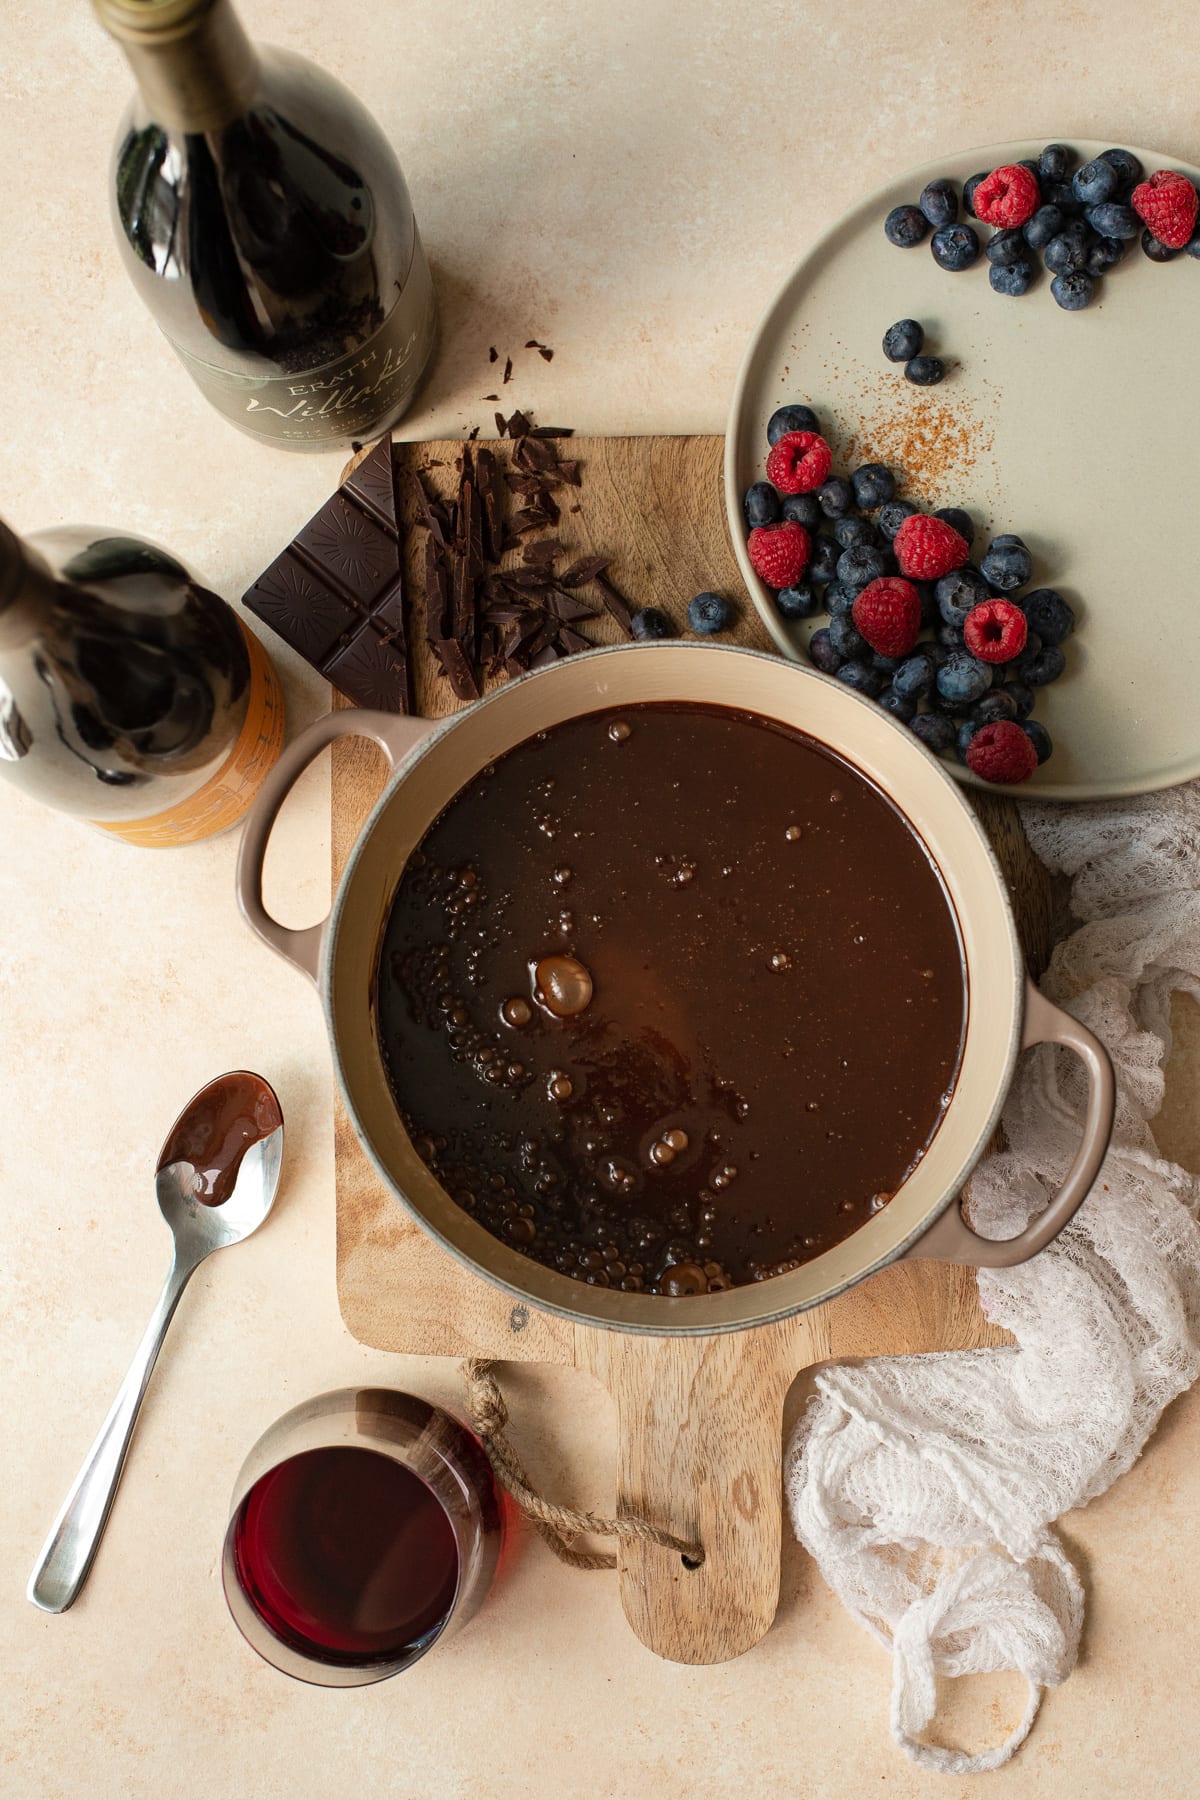
Tip! Cooking Pudding
Watch the pudding closely as it cooks. To prevent it from burning, don't let it sit too long unstirred, and avoid bringing it to a full, rolling boil.
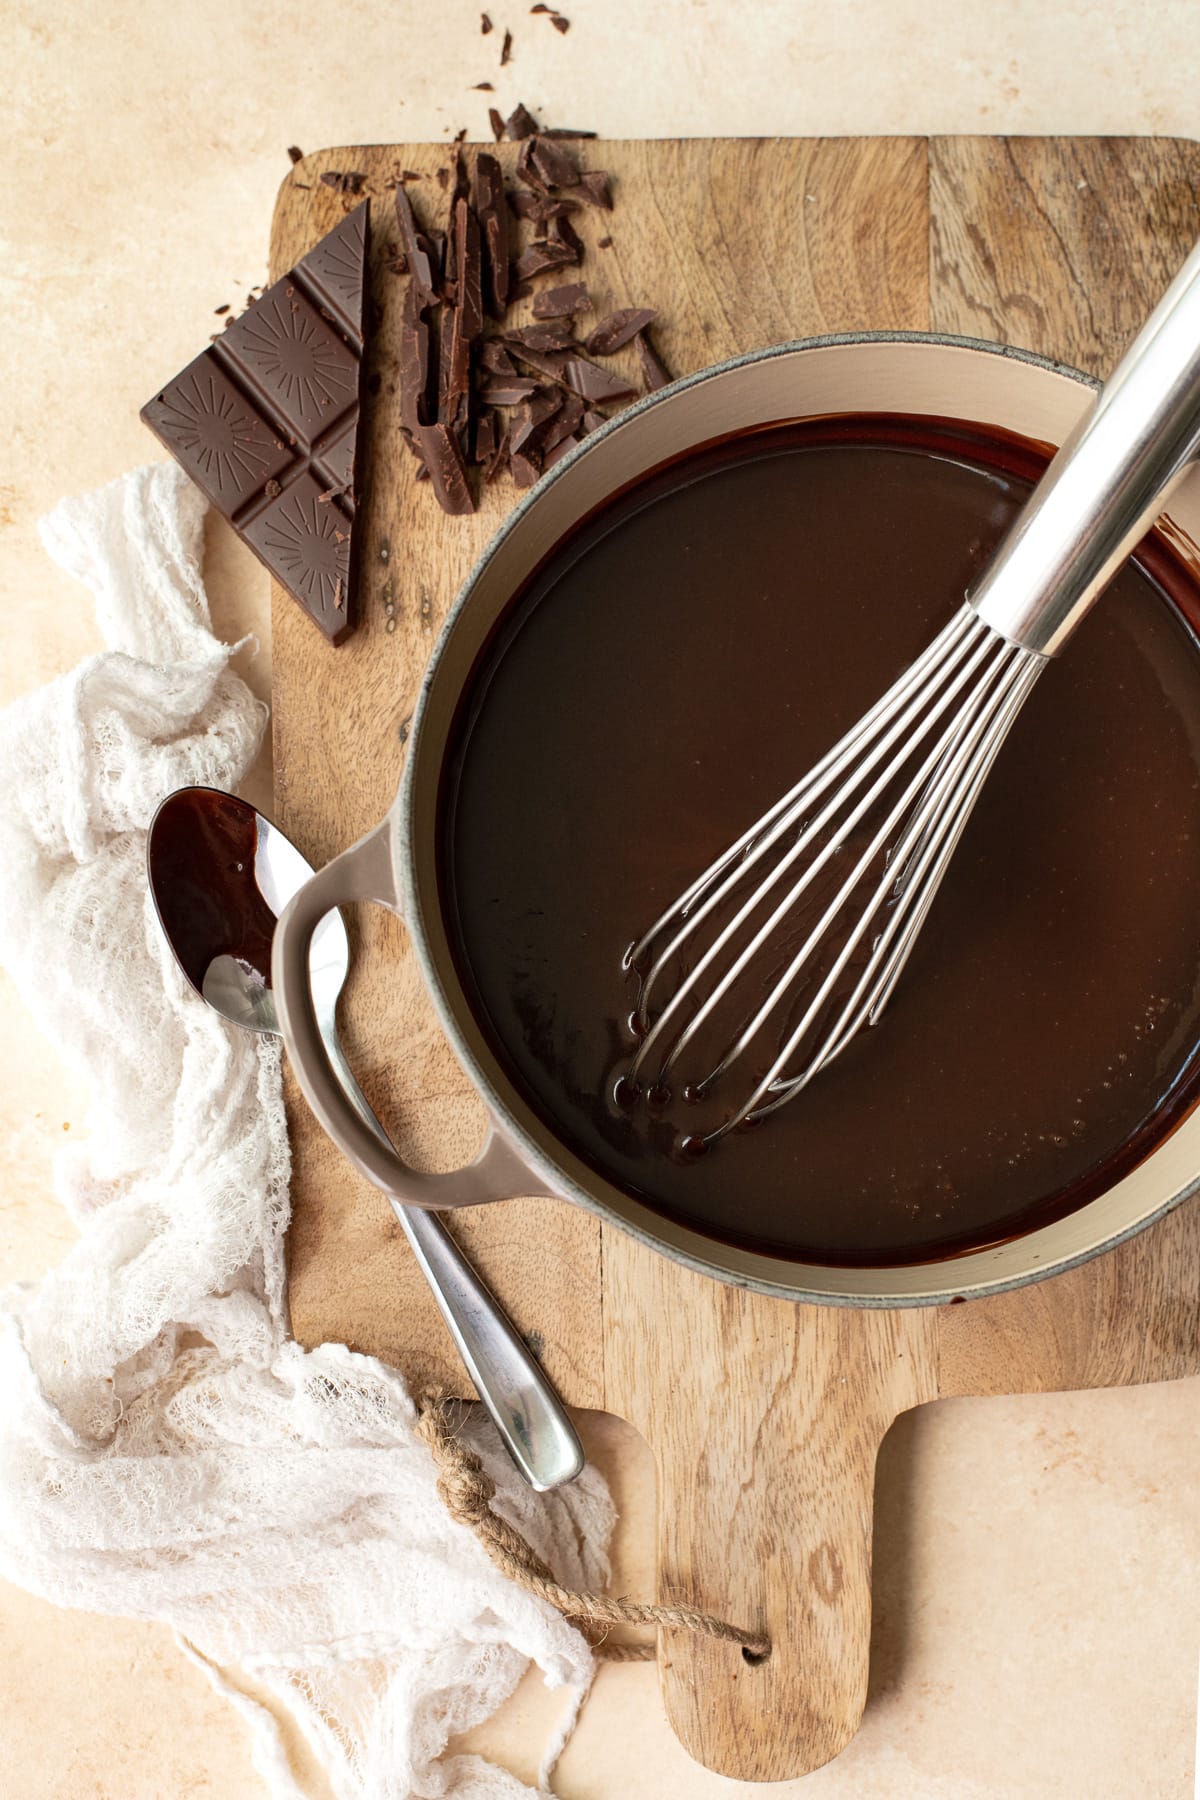
Step Two - Stir in chocolate and vanilla. Remove the saucepan from the burner and immediately add the chopped dark chocolate. Stir it in until it's completely smooth and glossy, and then stir in the vanilla extract.
Step Three - Transfer to serving dishes. Carefully divide the hot pudding between four to six small serving jars or ramekins. To prevent a skin from forming, cover the surface of each directly with plastic wrap. Transfer to the refrigerator to chill until set, at least 3-4 hours.
For the coconut whipping cream:
It's actually incredibly simple to make dairy-free and vegan whipped cream using canned coconut milk - and it truly doesn't taste like coconut! Like regular whipped cream, it's light and airy, with a hint of vanilla flavor and just the right amount of sweetness.
Tip! Making whipped cream with coconut milk
The key to this technique is to start with cans of coconut that have been refrigerated for at least 24 hours prior to use. Refrigerating will allow the coconut cream to separate from the liquid in the can, and it's the cream that you'll scoop out and whip. Refrigerating your mixing bowl for about 10 minutes prior to whipping is also helpful!
Step One - Whip together all ingredients. Open two small cans of refrigerated coconut milk and scoop the cream (not the water!) into a cold mixing bowl. Add powdered sugar and vanilla extract and whip with a handheld electric mixer on medium speed until the mixture is fluffy and holds its shape (about 1 minute).

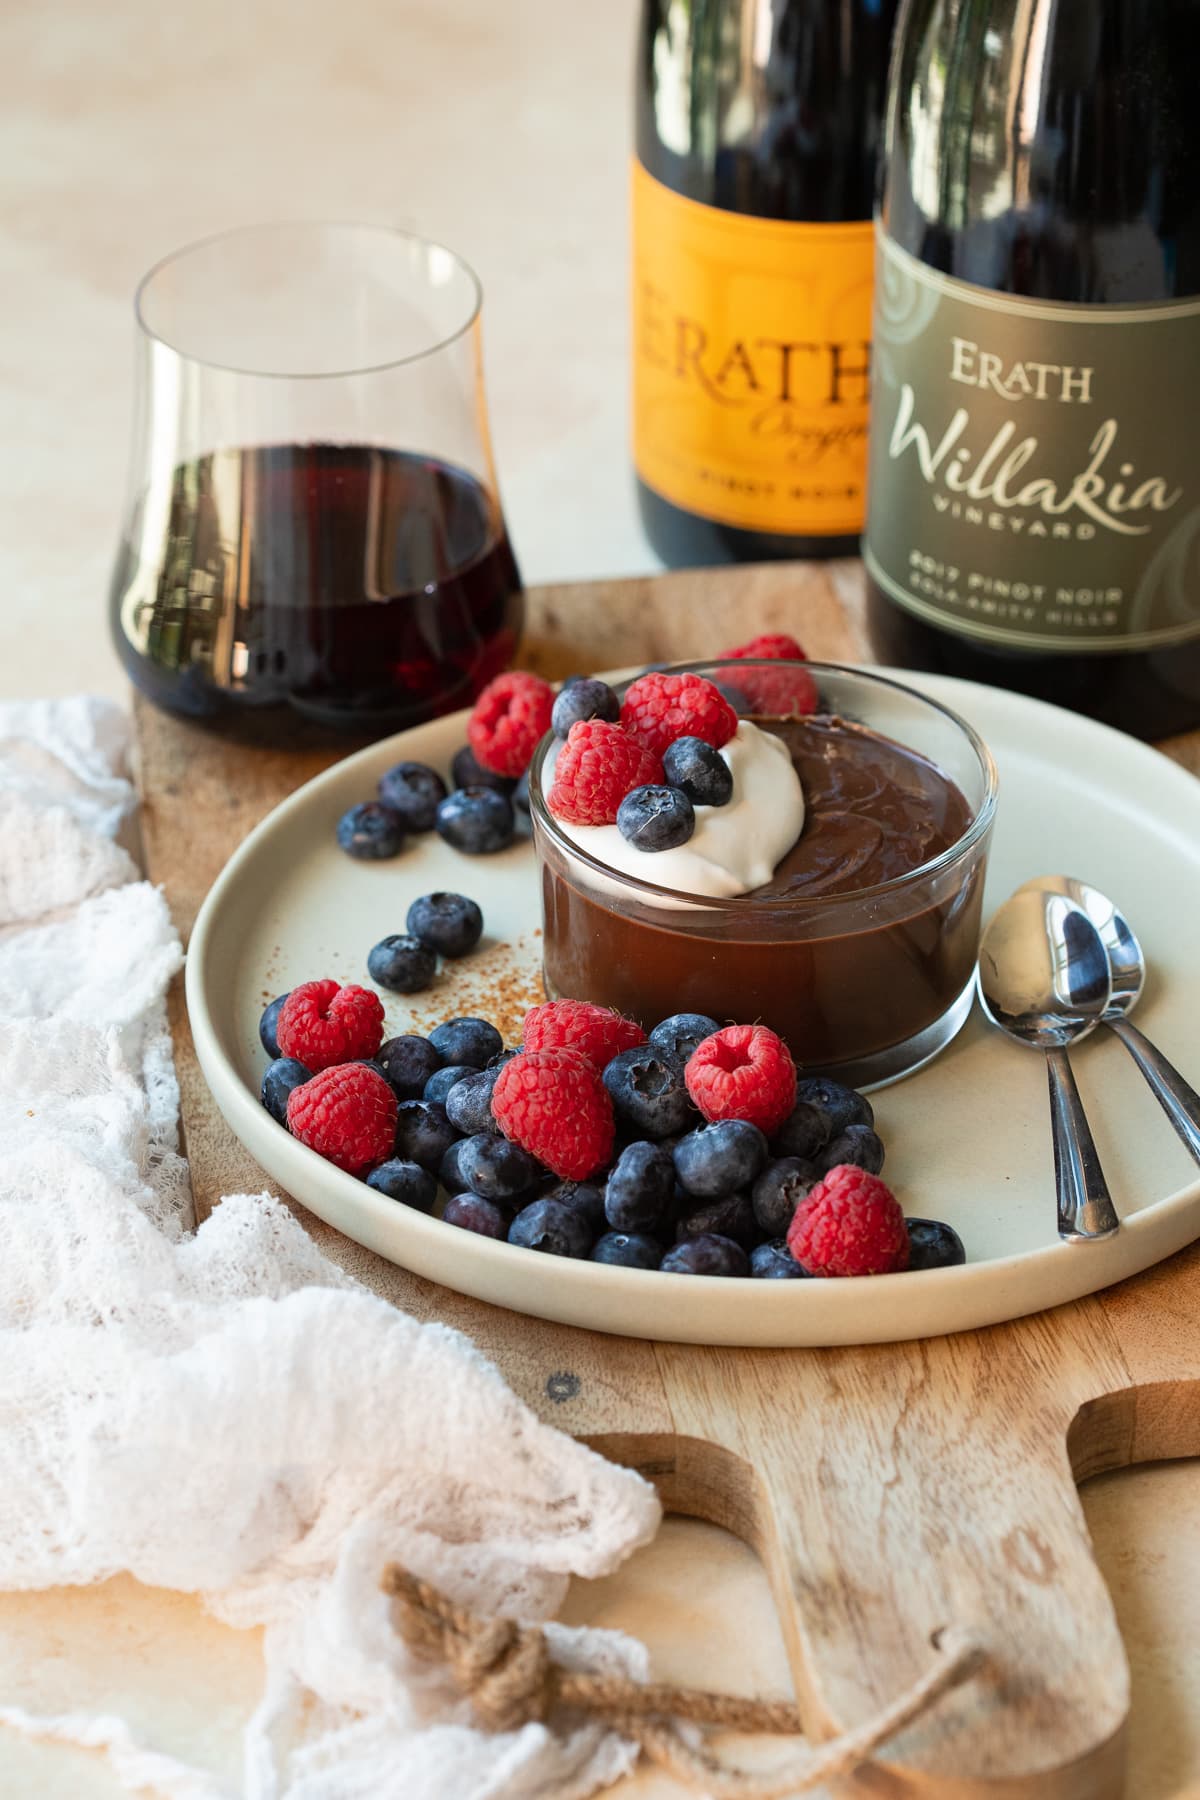
Serving Tips
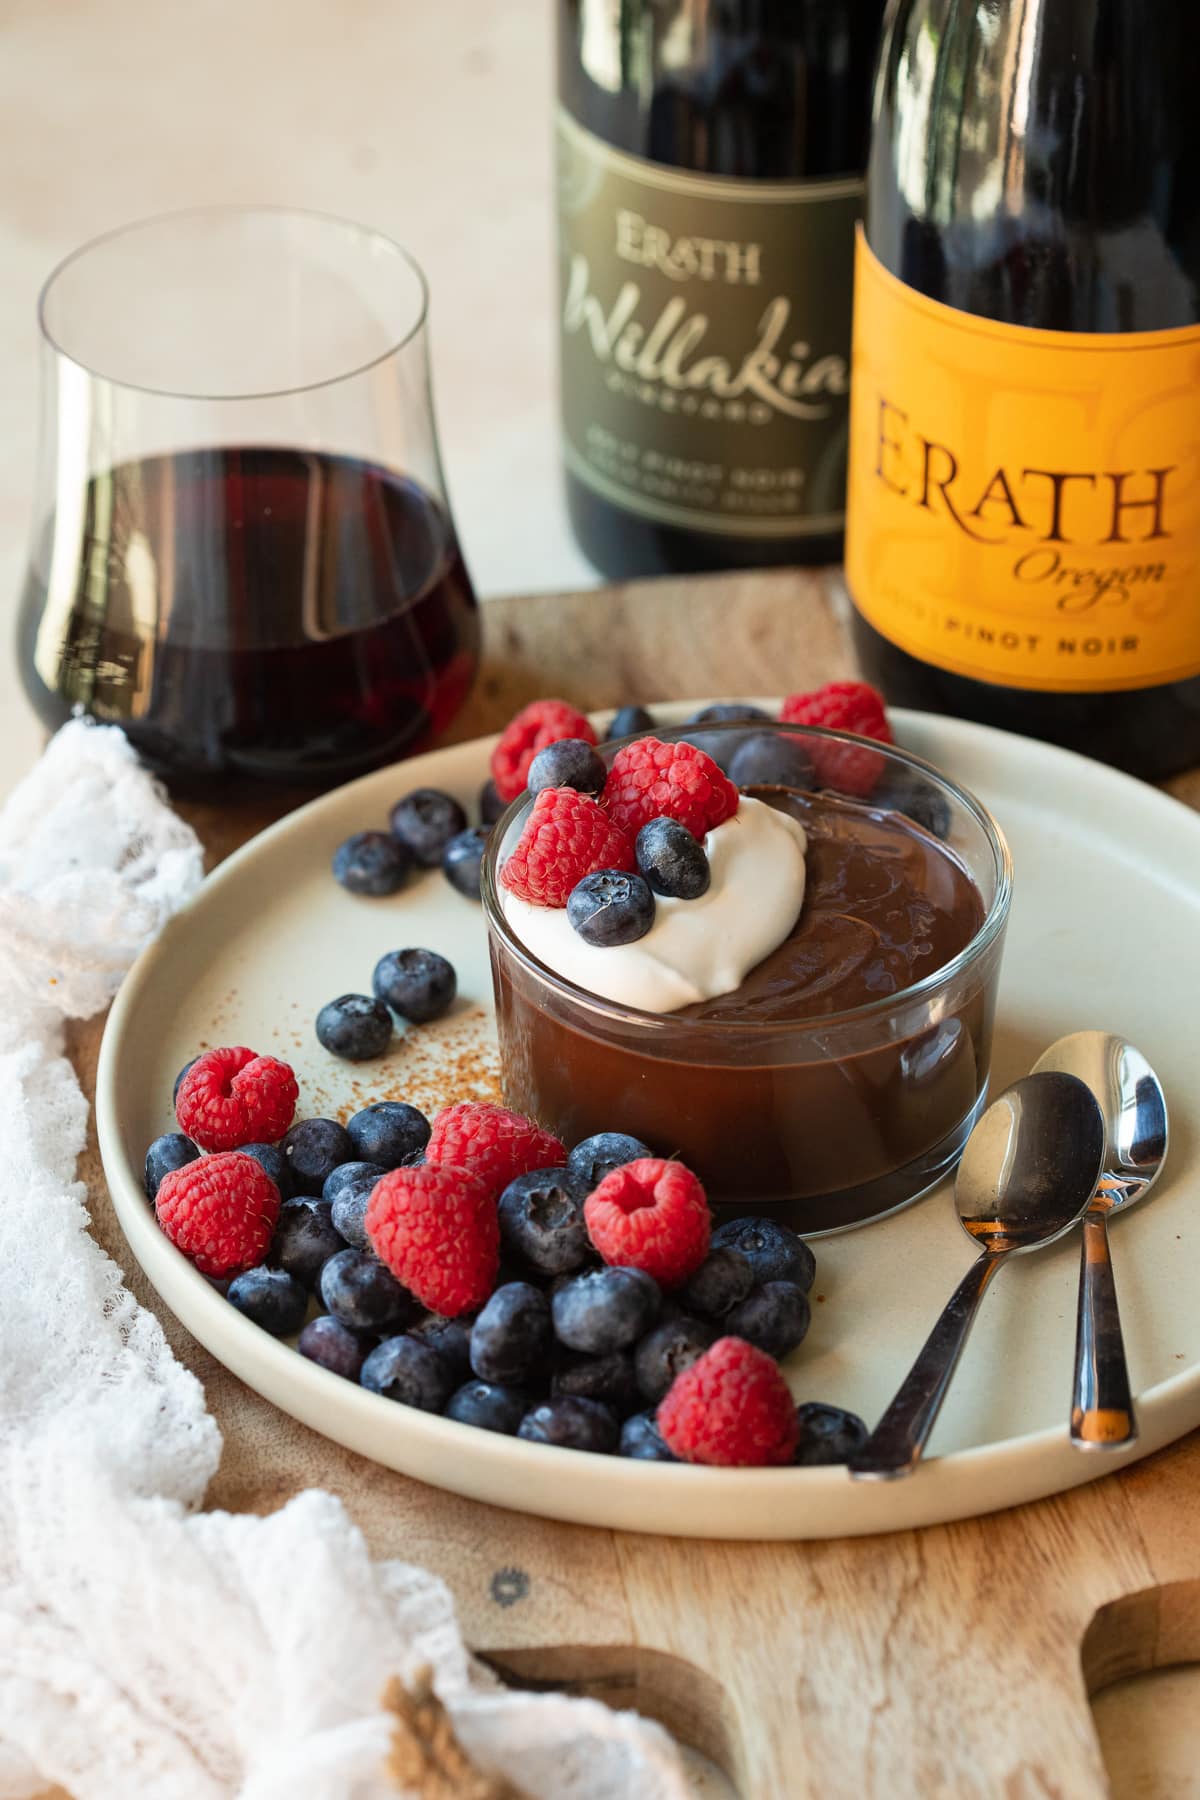
Although incredibly luxurious on its own, I've found that this dark chocolate pudding is best served with a dollop of coconut whipping cream and fresh raspberries. The whipped cream lightens up the pudding just enough, while the tart raspberries cut through the richness and really bring all of the flavors to life.

Recipe FAQ
The pudding can be kept refrigerated and covered in plastic wrap until ready to serve.
Likewise, the whipped cream can be kept in a bowl, covered with plastic wrap, and refrigerated. Whisk it briefly to loosen it up before you use it.
Both should keep well for 5-7 days.
Absolutely! Since the pudding needs time to set, this is a great recipe to quickly prep ahead of time and enjoy later. Simply store all components separately, and garnish the pudding with whipped cream and berries just before serving.
More dairy free and vegan chocolate desserts
- Healthy No-Bake Chocolate Coconut Balls {keto, gluten-free, vegan, sugar-free}
- Raspberry chocolate tart {gluten-free, vegan, refined sugar-free}
- Hazelnut Financier Cupcakes with Whipped Chocolate Ganache {dairy-free, gluten-free, refined sugar-free}
- Healthy Chocolate Cacao Nib Truffles {gluten-free, vegan}


Have you made this recipe?
If so, I'd love to hear your feedback; you can leave a rating and review in the comments section below! It's also so helpful if you help spread the word by sharing this post on your favorite social media channel. If you happen to snap a photo of what you've baked, be sure to share it on Instagram and tag me (@brighteyedbaker) so I can give you a shoutout!
Recipe Card

Quick and Easy Vegan Dark Chocolate Pudding
Ingredients
Vegan Chocolate Pudding
- 2 ½ cups full-fat coconut milk
- 8 ½ tablespoons real maple syrup
- 5 ½ tablespoons Dutch-process cocoa powder
- ½ cup coconut sugar
- 1 pinch salt
- 3 ounces dark/bittersweet chocolate finely chopped
- 4 teaspoons vanilla extract
Coconut Whipping Cream
- cream from two small (5.46 fluid ounce) cans full-fat coconut milk refrigerated 24 hours
- 2 ½ tablespoons unrefined powdered sugar
- 1 teaspoon vanilla extract
Garnish:
- fresh berries optional
Instructions
Vegan Chocolate Pudding
- Add coconut milk to a medium, heavy-bottomed saucepan set to (just over) medium heat. Add the maple syrup, cocoa powder, coconut sugar, and salt, whisking everything together well as the mixture heats. Once smooth, allow to come to a gentle boil, and maintain for about 10 minutes, stirring often. At this point, the mixture should be thick enough to coat a spoon, although it will thicken substantially more as it cools.2 ½ cups full-fat coconut milk |8 ½ tablespoons real maple syrup |5 ½ tablespoons Dutch-process cocoa powder |½ cup coconut sugar |1 pinch salt
- Remove the saucepan from the burner and immediately add chopped dark chocolate. Stir it in until completely smooth, and then stir in the vanilla extract.3 ounces dark/bittersweet chocolate |4 teaspoons vanilla extract
- Carefully divide the hot pudding between four to six small serving jars or ramekins. To prevent a skin from forming, cover the surface of each directly with plastic wrap. Transfer to the refrigerator to chill until set, at least 3-4 hours.
Coconut Whipping Cream
- Open two small cans of refrigerated coconut milk and scoop the cream (not the water!) into a cold mixing bowl. Add powdered sugar and vanilla extract and whip with a handheld electric mixer on medium speed until the mixture is fluffy and holds its shape (about 1 minute).cream from two small (5.46 fluid ounce) cans full-fat coconut milk |2 ½ tablespoons unrefined powdered sugar |1 teaspoon vanilla extract
Garnishing and Serving:
- Just before serving, top each pudding with a dollop of whipped cream and a few fresh berries, if desired.
Notes
Ingredients and Substitutions:
- Use full-fat, canned coconut milk - no substitutions! You'll also need separate cans of coconut milk for the dairy-free whipped cream, and these should be refrigerated for at least 24 hours prior to using them. For this recipe, I'd recommend buying 6 small (5.46 fl oz) cans of coconut milk, and refrigerating 2 of them for the coconut whipping cream.
- Maple syrup can be substituted with agave syrup.
- Use a good-quality dutch cocoa powder, as well as good-quality dark chocolate. To ensure that this recipe is vegan, make sure your dark chocolate is also vegan. Look for one with around 70% cocoa, or use an even higher percentage to cut back on the sweetness.
- Unrefined cane sugar or brown sugar would likely work as substitutes for the coconut sugar in this recipe. You can also reduce the coconut sugar for a pudding that's less sweet.
- Use unrefined powdered sugar in the coconut whipping cream to keep this recipe refined sugar-free. While cane sugar will also work, the results may be less smooth.
Storage and shelf life:
- Chocolate pudding can be kept refrigerated and covered in plastic wrap until ready to serve.
- Whipped cream can be kept in a bowl, covered with plastic wrap, and refrigerated. Whisk it briefly to loosen it up before you use it.
- Both can easily be made in advance and should keep well for 5-7 days.
Nutrition
Nutrition information is an estimate per serving, calculated using standard ingredients. Actual values may vary based on brands used, measurement methods, and more.


M.R.G.
Super easy to make, I wasn't sure I would like it because it didn't use regular sugar. I was surprised when I tasted it I was shocked at how rich and sweet it was! I must admit, I have to double the recipe the next time because it was gone as soon as it was pulled out of the fridge!!! Well done Bright-Eyed Baker, - keep up the great work. Thank you, Robert G.
Sandra
You do such a good job of teaching us all. Thank you!
Alex
These pictures looks good and I bet it is super delicious, can you freeze them?
alexandra
I don't think it would freeze well, but considering the pudding only takes about 15 minutes to make, it's easy to whip up at a moment's notice! It also doesn't make a huge amount and should keep well in the fridge for about a week. You could probably even halve the recipe without an issue if you're concerned about making too much. :)
Greg
This pudding is the greatest thing I’ve ever tasted. Hands down it’s the best pudding ever