
Sometimes I surprise myself with the things I decide to DIY. I never expected that I'd be making homemade versions of things like maraschino cherries and cinnamon chips, and I definitely didn't see myself as the kind of person who would decide to make my own chocolate curls all for the sake of a dessert garnish. I'm sure there are people out there who will see this and doubt my sanity - because, yes, I did spend the better part of a HOT summer day learning how to make thin, fragile, and highly meltable chocolate curls, but hey, no regrets. They're fun and they're fancy and they're kinda impressive; I like that.
There aren't a lot of steps to this whole ordeal, so the only real challenge is managing to keep the chocolate at the perfect temperature where it neither flakes from being too cold nor melts from being too hot while you work. There's that, and getting the hang of the whole curling process, which is really sort of an artistic thing that's open to expirementation anyway.
Step 1: You start out with your favorite chocolate, and either chop it really finely or grate it, like so:

Then, you're going to melt the chocolate with a little bit of coconut oil or vegetable shortening (either way, it's basically a negligible amount) and spread it out onto a baking sheet to make a gorgeous glossy layer of melted chocolate. At this point, you'll probably consider scrapping the whole idea and just licking the tray instead, but, you know, don't. ;)

After that, it's just a matter of popping the tray in the freezer for a few minutes so the chocolate can set, and then using a flat spatula to create all those cute little curls. This is the part where you want to work fast to avoid a million and one trips to and from the freezer, but even if it comes to that, it'll work out.

If I'm starting to scare you off here, look at these chocolate curls and TELL ME you don't want them sprinkled on your next cake, or garnished on your next pie, or put anywhere you can possibly get away with adding a few edible curls of chocolate. Because you guys? It's worth it forsurrrrrre.
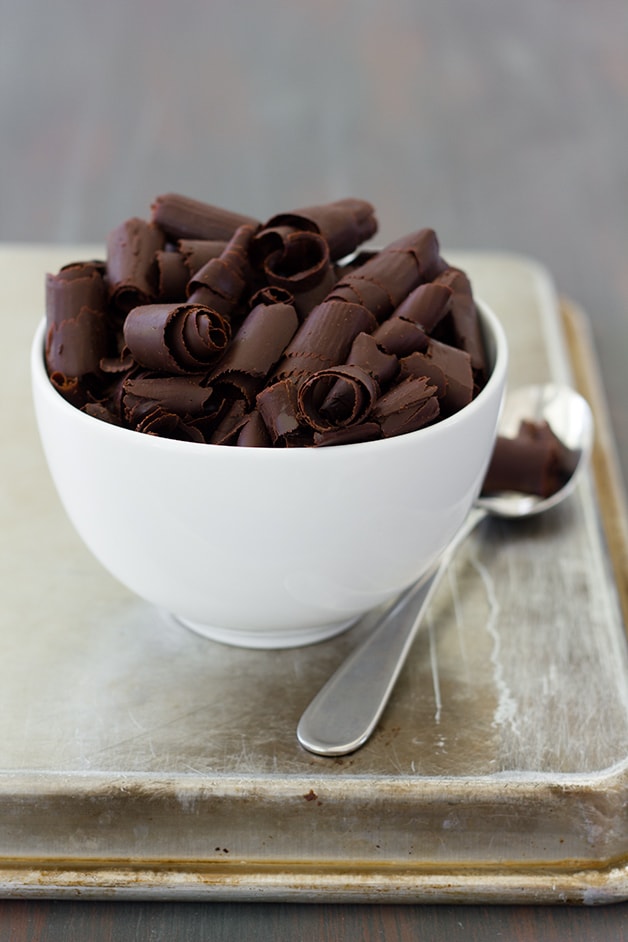
DIY Chocolate Curls
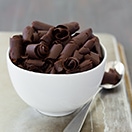
Use two simple ingredients to make your own chocolate curls for a fancy and impressive dessert garnish.
Ingredients
- 3 ounces good quality chocolate (bittersweet or semisweet), grated or finely chopped*
- 1 teaspoon coconut oil or vegetable shortening
Instructions
- Combine the chocolate and oil/shortening in a microwave-safe bowl and microwave for 30 seconds. Stir and microwave for another 30 seconds or so, until all of the chocolate has melted. Stir to smooth out.
- Pour the melted chocolate onto the back of a metal baking tray and use an offset spatula to spread out in a very thin layer in a rectangular shape. Make sure the chocolate layer is even and does not have any holes or gaps. Place in the freezer for 10-15 minutes to set before attempting to make curls. Meanwhile, line a plate or tray with parchment paper and set aside.
- To make curls, use a flat spatula with a thin, somewhat sharp edge (like the one pictured above) and hold at an angle with the front tip against one edge of the chocolate layer. Push away from you as the first strip of chocolate begins to lift up from the pan and curl, continuing until it is completely released from the pan. You can adjust the width of your curls depending on how much of the spatula you use for each strip. If the chocolate flakes when you try to curl it, it's too cold and needs to soften very briefly. If it doesn't curl and/or is melty, it's too soft and needs to be put back in the freezer for a minute or two longer.
- As you make the curls, use a toothpick to carefully transfer them to the parchment-lined plate/tray and place in the refrigerator. If they are quickly getting soft, leave them on the metal baking tray and place them back in the freezer for a few minutes to set before transferring to the refrigerator. Continue until all chocolate has been curled, returning tray to the freezer to cool down the remaining chocolate as needed during the process.
- Once curls have set in the refrigerator, transfer to an airtight container (where they won't get smashed) and keep refrigerated until ready to use.
Notes
*I grated my chocolate with a Microplane zester/grater .
Be aware that, particularly in the summer months, the chocolate will melt quickly. Aim to work fast and don't hesitate to chill the chocolate in the freezer as needed before continuing.
Variations: You can experiment with the look of your chocolate curls by using different spatulas or similar utensils to create the curls, and also by holding the utensil at different angles while curling. You can also make curls that are more spread out, rather than tightly coiled, by aiming to the left or right as you make each curl, rather than working in a straight line.
This post contains affiliate links. Links are always for products I have personally used and love. :)
For more recipes and other food-related tidbits, stick around and subscribe to receive new blog updates by e-mail or RSS. You can also find recipes by category in the recipe index.

![]()
![]()
![]()
![]()
![]()
![]()
![]()

Russell from Chasing Delicious
This is such a handy tutorial. I am going to put chocolate curls on everything!
alexandra
Thanks Russell! Chocolate curls on everything = always a good idea. :)
ami@naivecookcooks
I had no idea toy can make your own chocolate Curls!! Genius!
alexandra
Yess! It's a pretty cool thing, right?!
Ellen @ Indigo Scones
I love love love chocolate curls. I think it's just the curly girl in me relating strongly to something baking-related, how can I resist? Yours are just beautiful, the perfect Botticelli curl!
And, seriously, your photos are stunning.
xoxo
alexandra
Thanks so so much Ellen! You're super sweet. :)