
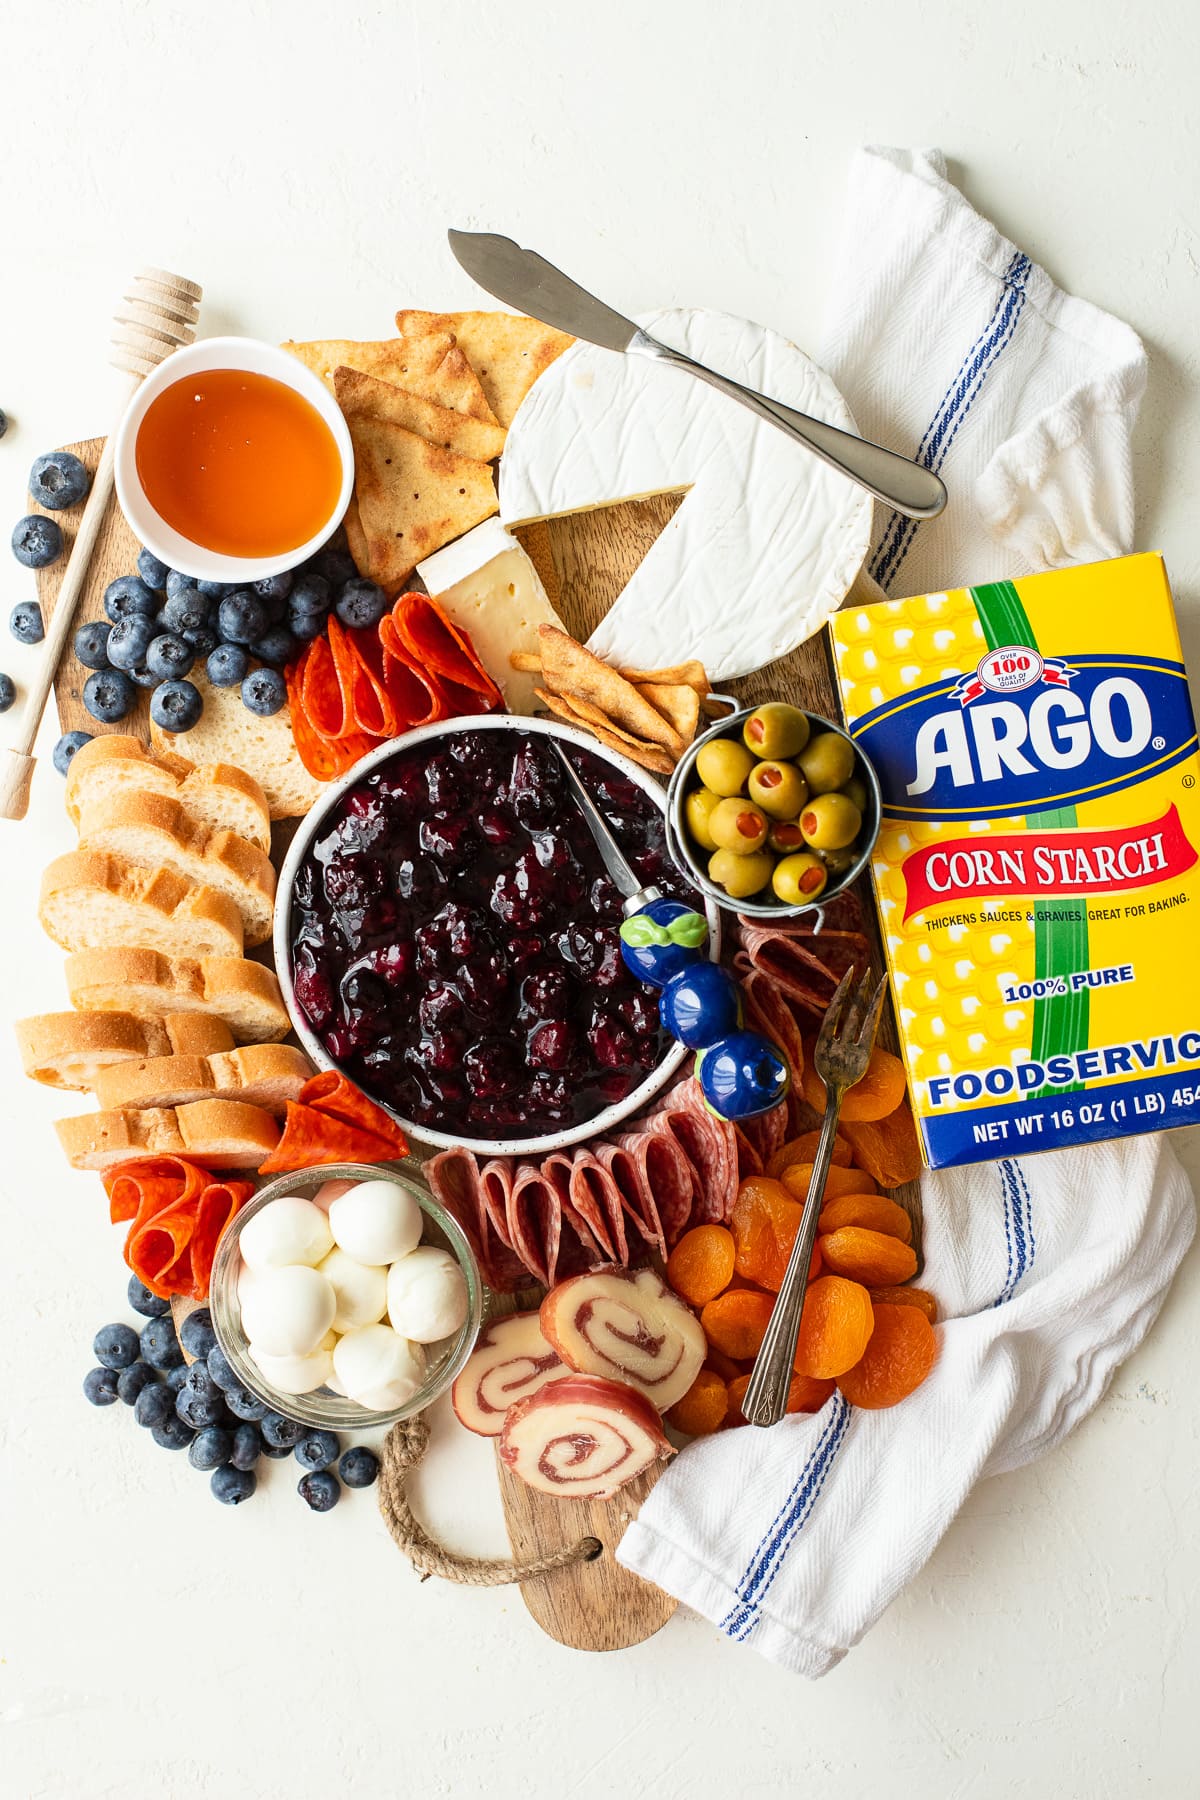
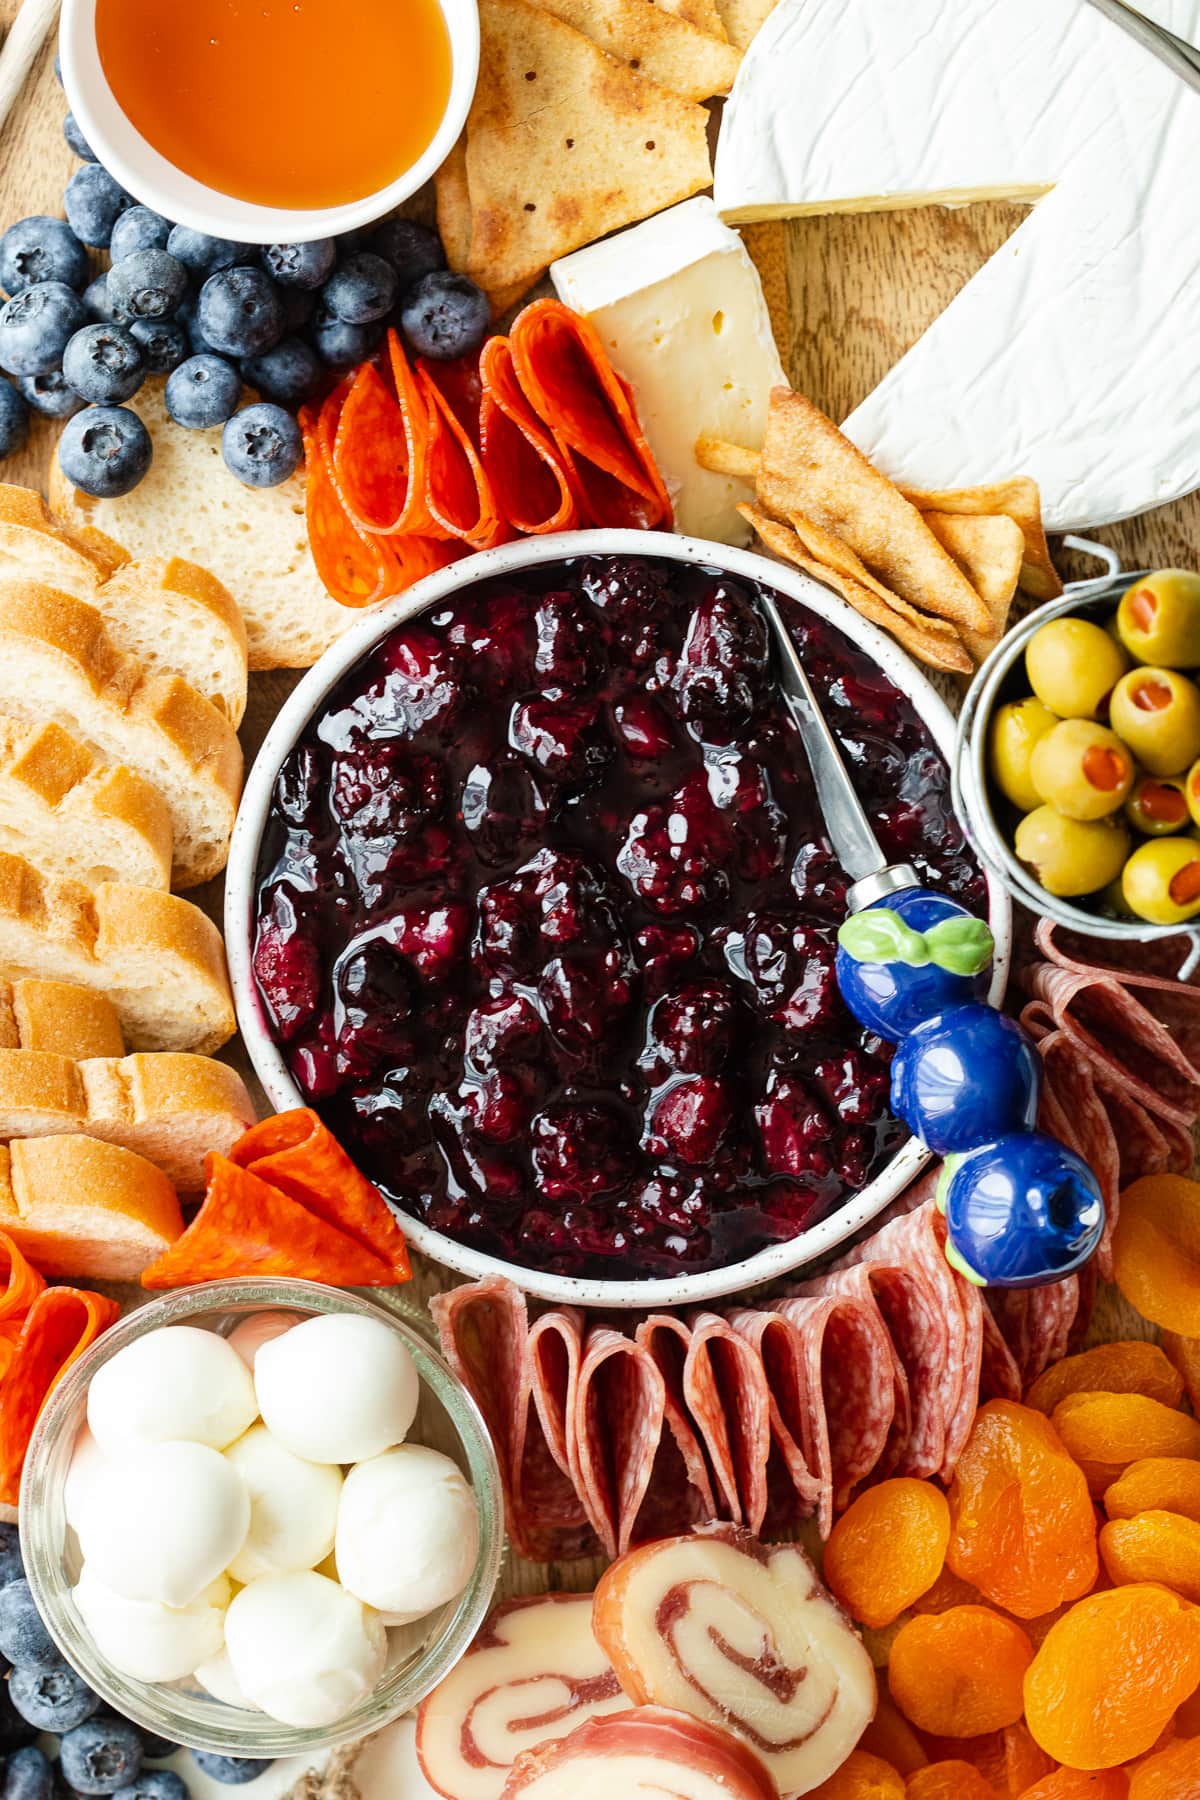
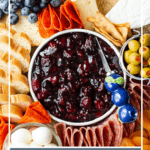
This quick and simple charcuterie board is made with a variety of meats and cheeses alongside an easy homemade mixed berry compote. The fruit compote cooks in less than 10 minutes, and acts as a sweet, fruity sauce that can be spread over baguette slices or crackers. This gourmet charcuterie board makes the perfect appetizer for date nights, holiday parties, or any other event!

Any gathering with good company deserves good food, and there's truly no appetizer that'll impress your guests like a charcuterie board - even though it's surprisingly simple to make one. In fact, I'll let you in on a little secret: you can DIY your own gourmet charcuterie board with any mixture of fruits, meats, cheeses, and other finger food you have on hand. For an extra homemade touch, try adding a quick and easy fruit compute to your board - this triple berry version is incredibly simple!
Jump to:
4 reasons to love charcuterie boards
- They're easy to put together - a perfect no-cook appetizer or snack option.
- They're flexible, and can cater to a variety of diets and preferences based on what elements you decide to include in your board. Use gluten-free crackers/bread like I did here for a gluten-free charcuterie board, or skip the meat for a vegetarian cheese board!
- They can be made as large or small as you'd like. A mini, two-person charcuterie board would be perfect to serve on date night, while a massive one can easily serve a crowd when you're entertaining.
- They're well-suited for a variety of events - think office parties; Thanksgiving, Christmas, and other holidays; bridal showers; or even a casual get-together with friends. They'd also make a great gift for a housewarming party!
What to include on your board
The word charcuterie is a French term that refers to the prepared meats traditionally included in a charcuterie board, hence the name. But that doesn't mean your board should be limited to meats! In fact, while meat and cheese are typically essentials here, there are plenty of elements you can include. For a well-rounded board, try to aim for at least one food from each of the following categories:
- Meats: Chorizo, prosciutto, salami, sausage, soppressata, pepperoni
- Cheese:
- Soft: fresh mozzarella or burrata
- Creamy: brie or camembert
- Tangy: chèvre or feta
- Firm: parmesan or cheddar
- Aged: gruyere or gouda
- Crackers/Bread: Mixed crackers, crisps, baguette slices, crostini - gluten-free if desired!
- Spreads: Fruit compote, pesto, olive oil, honey, jam, jelly, hummus
- Fruits: berries, figs, apple slices, grapes
- Vegetables (or crudités): Baby carrots, cucumbers, celery, small tomatoes, mini bell peppers
- Fillers: Nuts, olives, dried fruit

Tips for building the perfect charcuterie board
- Get creative with surfaces. Most boards are built on some sort of wooden surface for a rustic touch, but feel free to use a serving platter, marble pastry board, baking tray, pizza stone, or something similar. You can also switch up your bowls and platters by using small pottery, wooden bowls, or glass jars.
- Include a variety of shapes, sizes, and colors when choosing ingredients and serving vessels. This will help you achieve that quintessential charcuterie board aesthetic.
- Assemble large to small. Place the biggest items on your board first, like any bowls, platters, or large blocks of cheese, and be sure to spread them out. Then, start building around these "anchors", adding the smallest items last to fill in whatever gaps you might be left with.
- Aim for a variety of flavors - savory, sweet, tart, spicy, tangy, etc.
- Use what you have. This is a great opportunity to look through your fridge and pantry and throw in any random ingredients you might find. If it's a small amount, it can easily act as filler for your board!
- Don't forget the serving utensils - cheese knives, spoons, olive forks, etc.
- Prep ahead. Charcuterie boards can sit at room temperature for about 2 hours, but it's a good idea to prep individual components ahead of time. This will make assembling easy, and will also allow you to have backup ingredients ready in the event that your board needs replenishing. Prep your ingredients in advance by rinsing fruits and veggies, slicing cheeses, meats, and produce as needed, and making any spreads you plan to include with your board.
- Plan for 3-5 ounces of meat per person. If you're making a meatless board, compensate with extra cheese, fruits, and vegetables.
How to make a quick and easy fruit compote for your board
A compote is a chunky fruit sauce that's cooked quickly over the stovetop, and it's a simple way to add a homemade touch to any charcuterie board. It's also fairly inexpensive to make, and offers a great way to use up leftover fruit. This mixed berry compote is sweet, fruity, and vibrant, with just a hint of tartness, and it takes less than 10 minutes to whip up! It's also naturally gluten-free, refined sugar-free, and vegan.
What you'll need
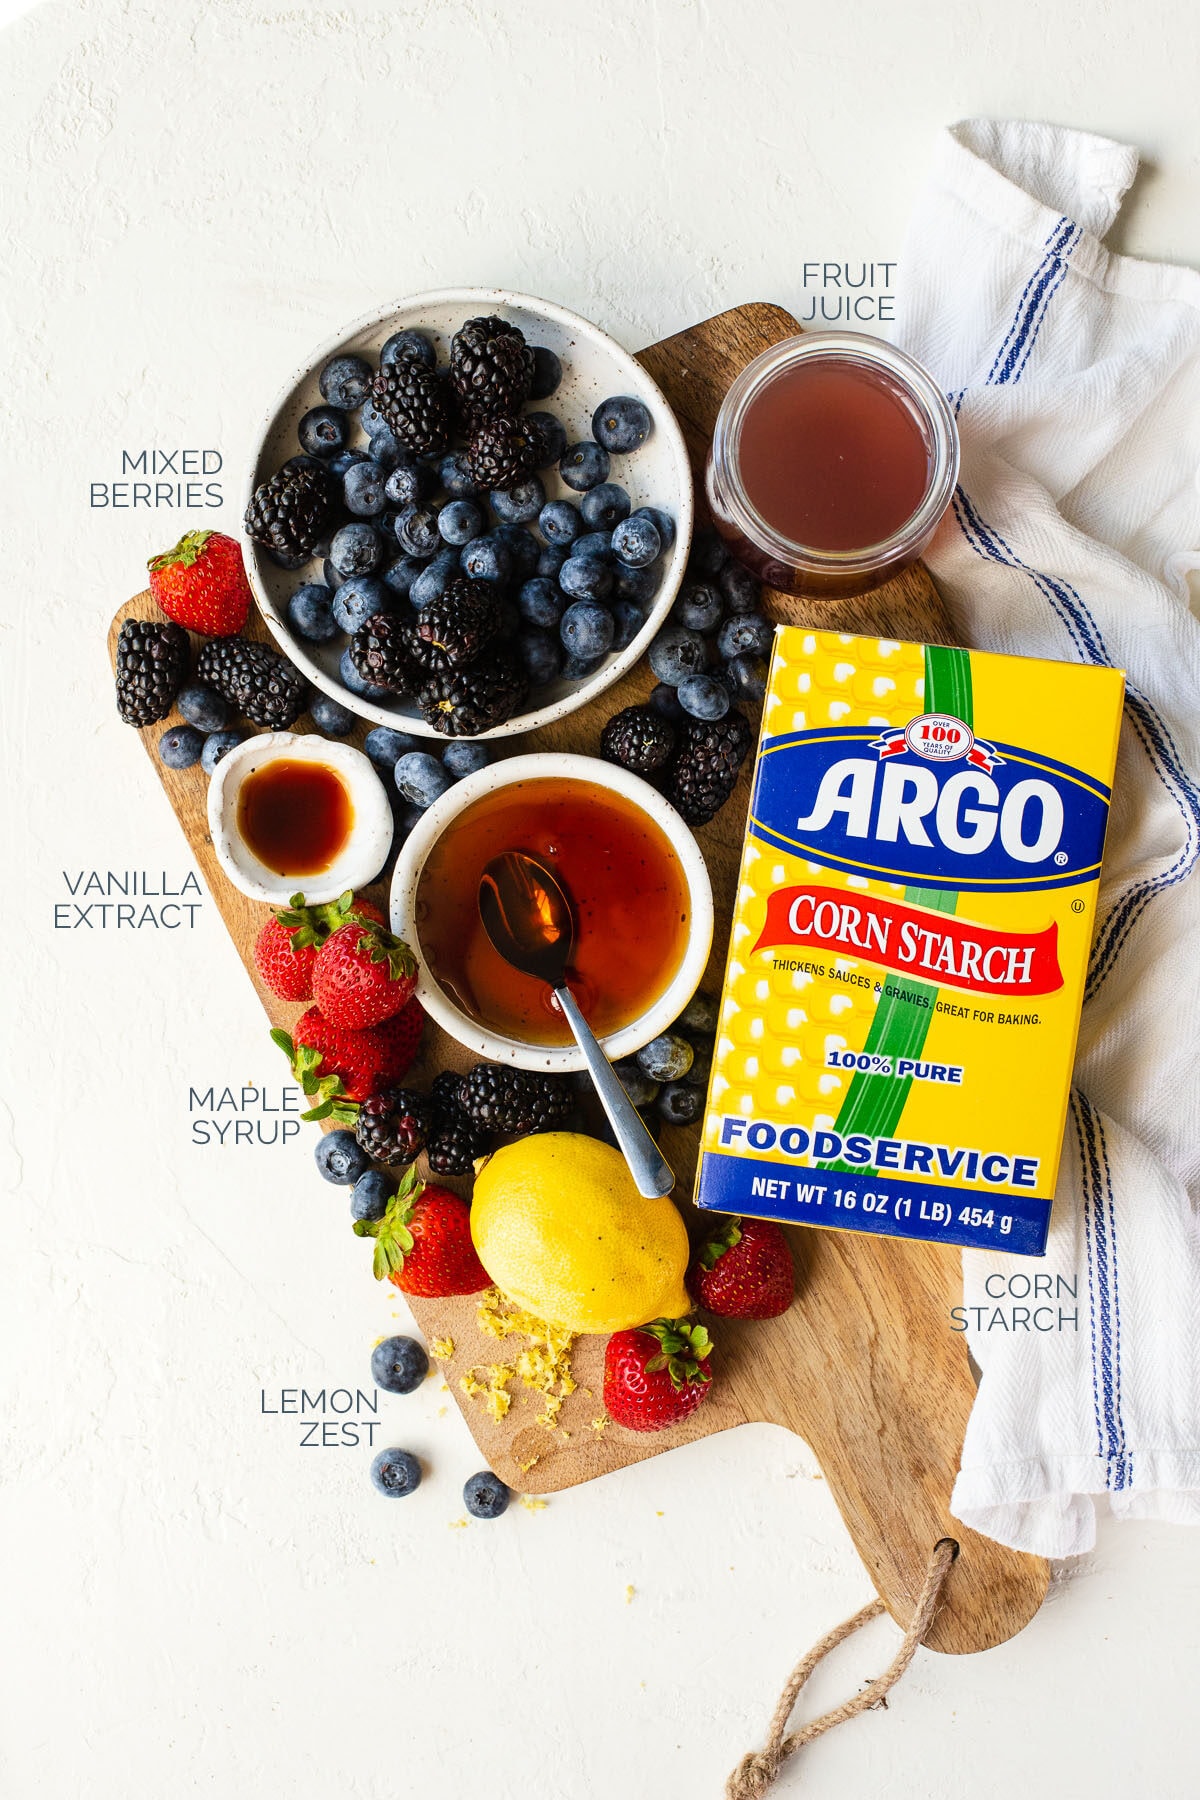
- Berries: These can be fresh or frozen, but frozen berries may take slightly longer to cook down and thicken. Use a variety like I did here for this triple berry compote (with strawberries, blackberries, and blueberries), or stick to a single type. Anything goes! Smaller berries can be left whole, but larger fruit should be chopped.
- Fruit juice: I recommend using a good-quality organic juice with no sugar added. I used a blueberry pomegranate juice, but anything with a complementary flavor will work!
- Maple syrup: Use true maple syrup, not the fake stuff! This natural sweetener keeps the compote refined sugar-free. Agave syrup will also work, or try honey if you're not concerned about making a vegan compote.
- Corn starch: With twice the thickening power of flour, a little cornstarch does a great job of thickening this triple berry compote into the perfect fruity spread.
- Extras: Lemon zest and vanilla extract
Step-by-step instructions
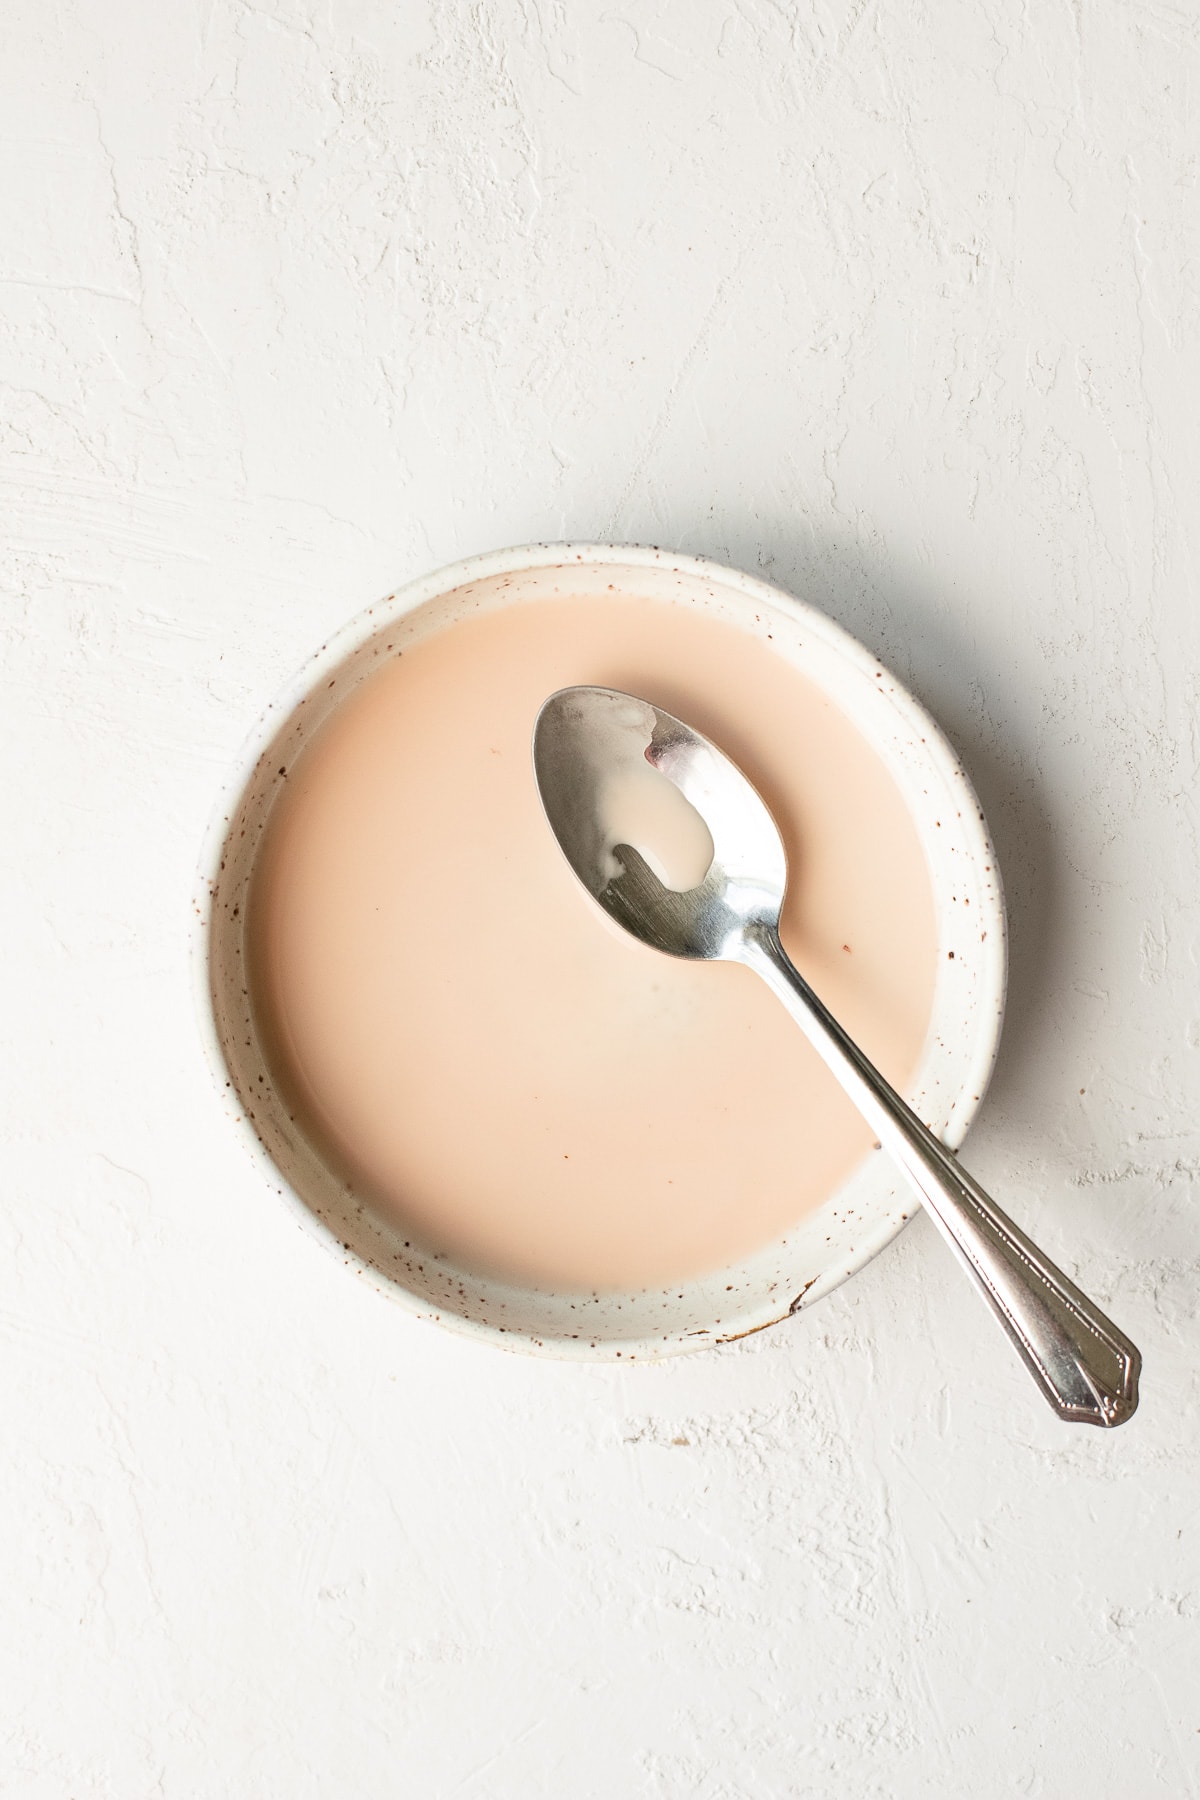
Step One - Prep the corn starch: In a small bowl, stir or whisk together 1 tablespoon of cornstarch with 1 tablespoon of fruit juice, making sure the cornstarch gets completely dissolved. This mixture is called a slurry - set it aside until step three.
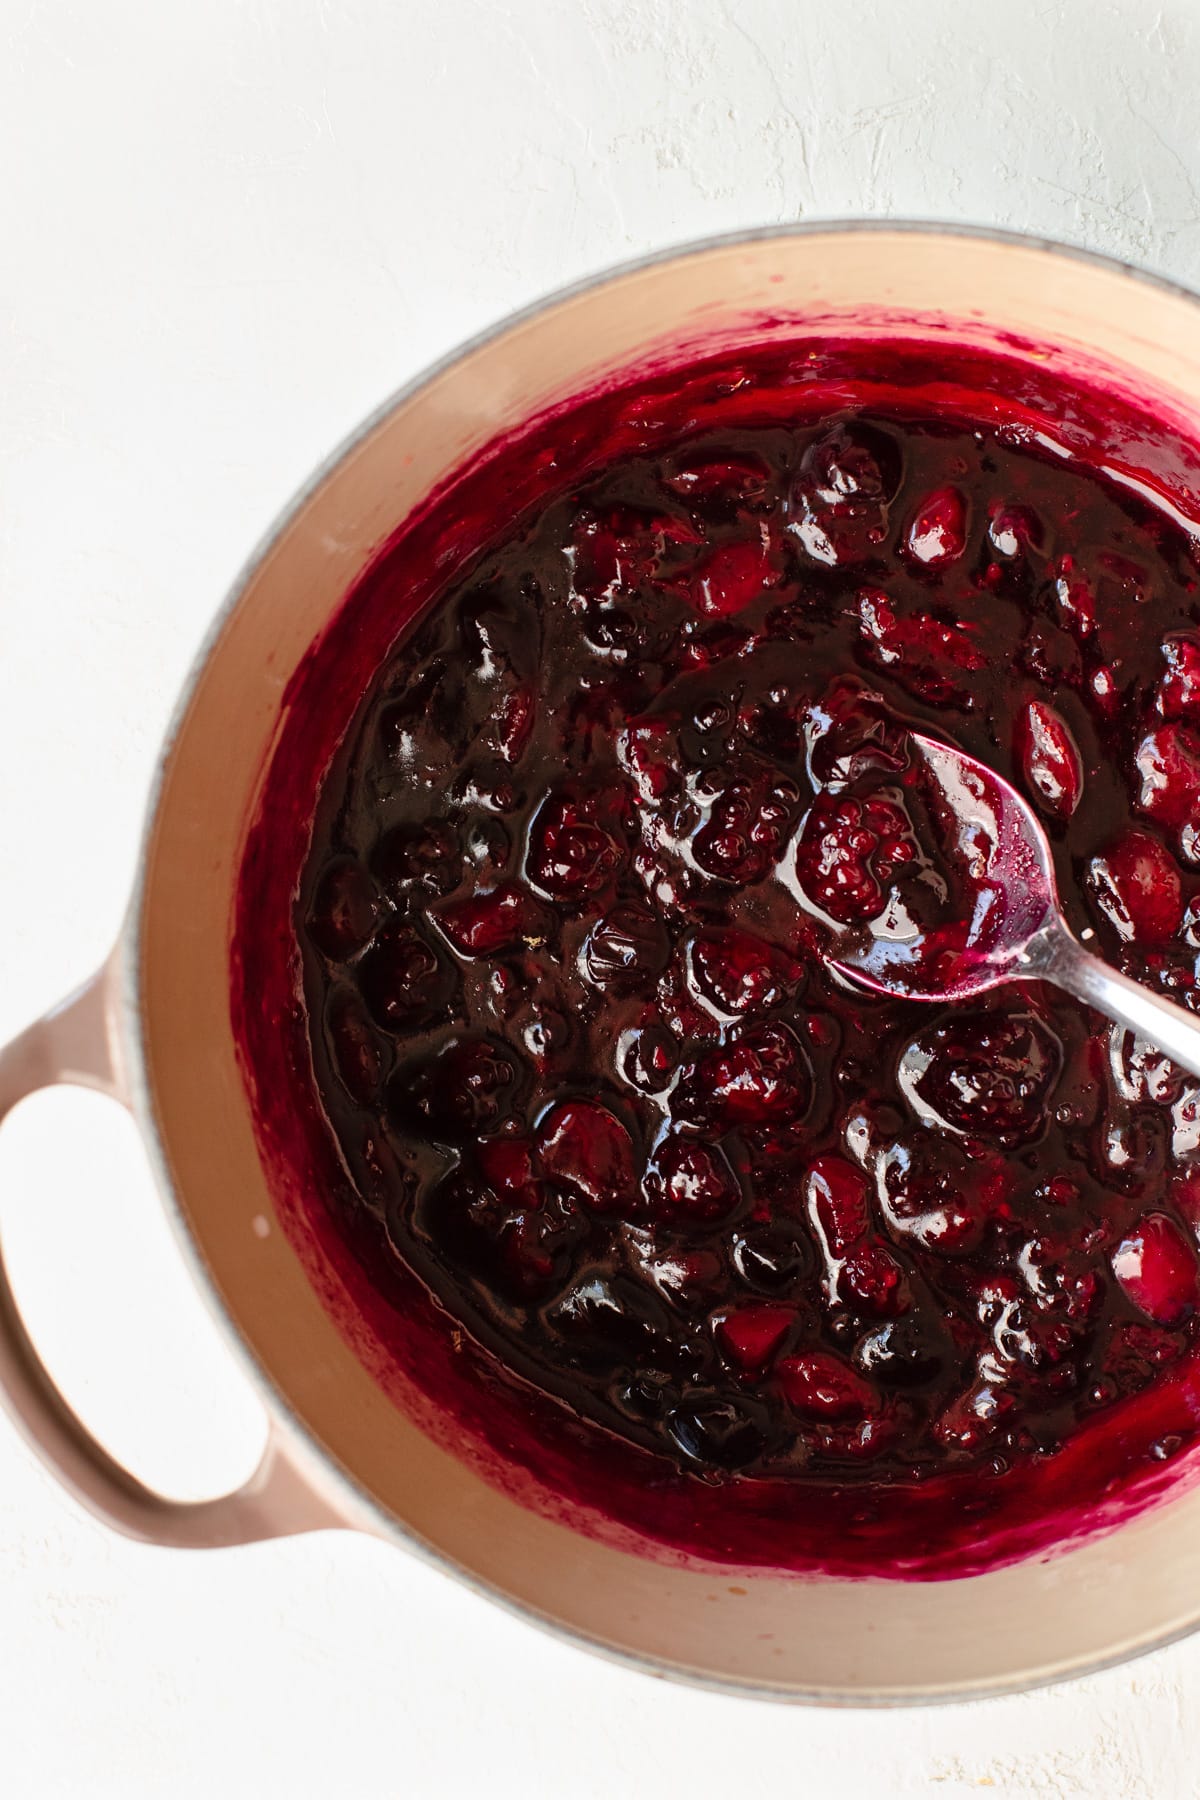
Step Two - Simmer the berries, remaining juice, and maple syrup. Combine them in a medium saucepan set over medium heat and let them simmer for about 5 minutes, stirring occasionally. The berries should start to soften and break down, and the mixture should be juicy.
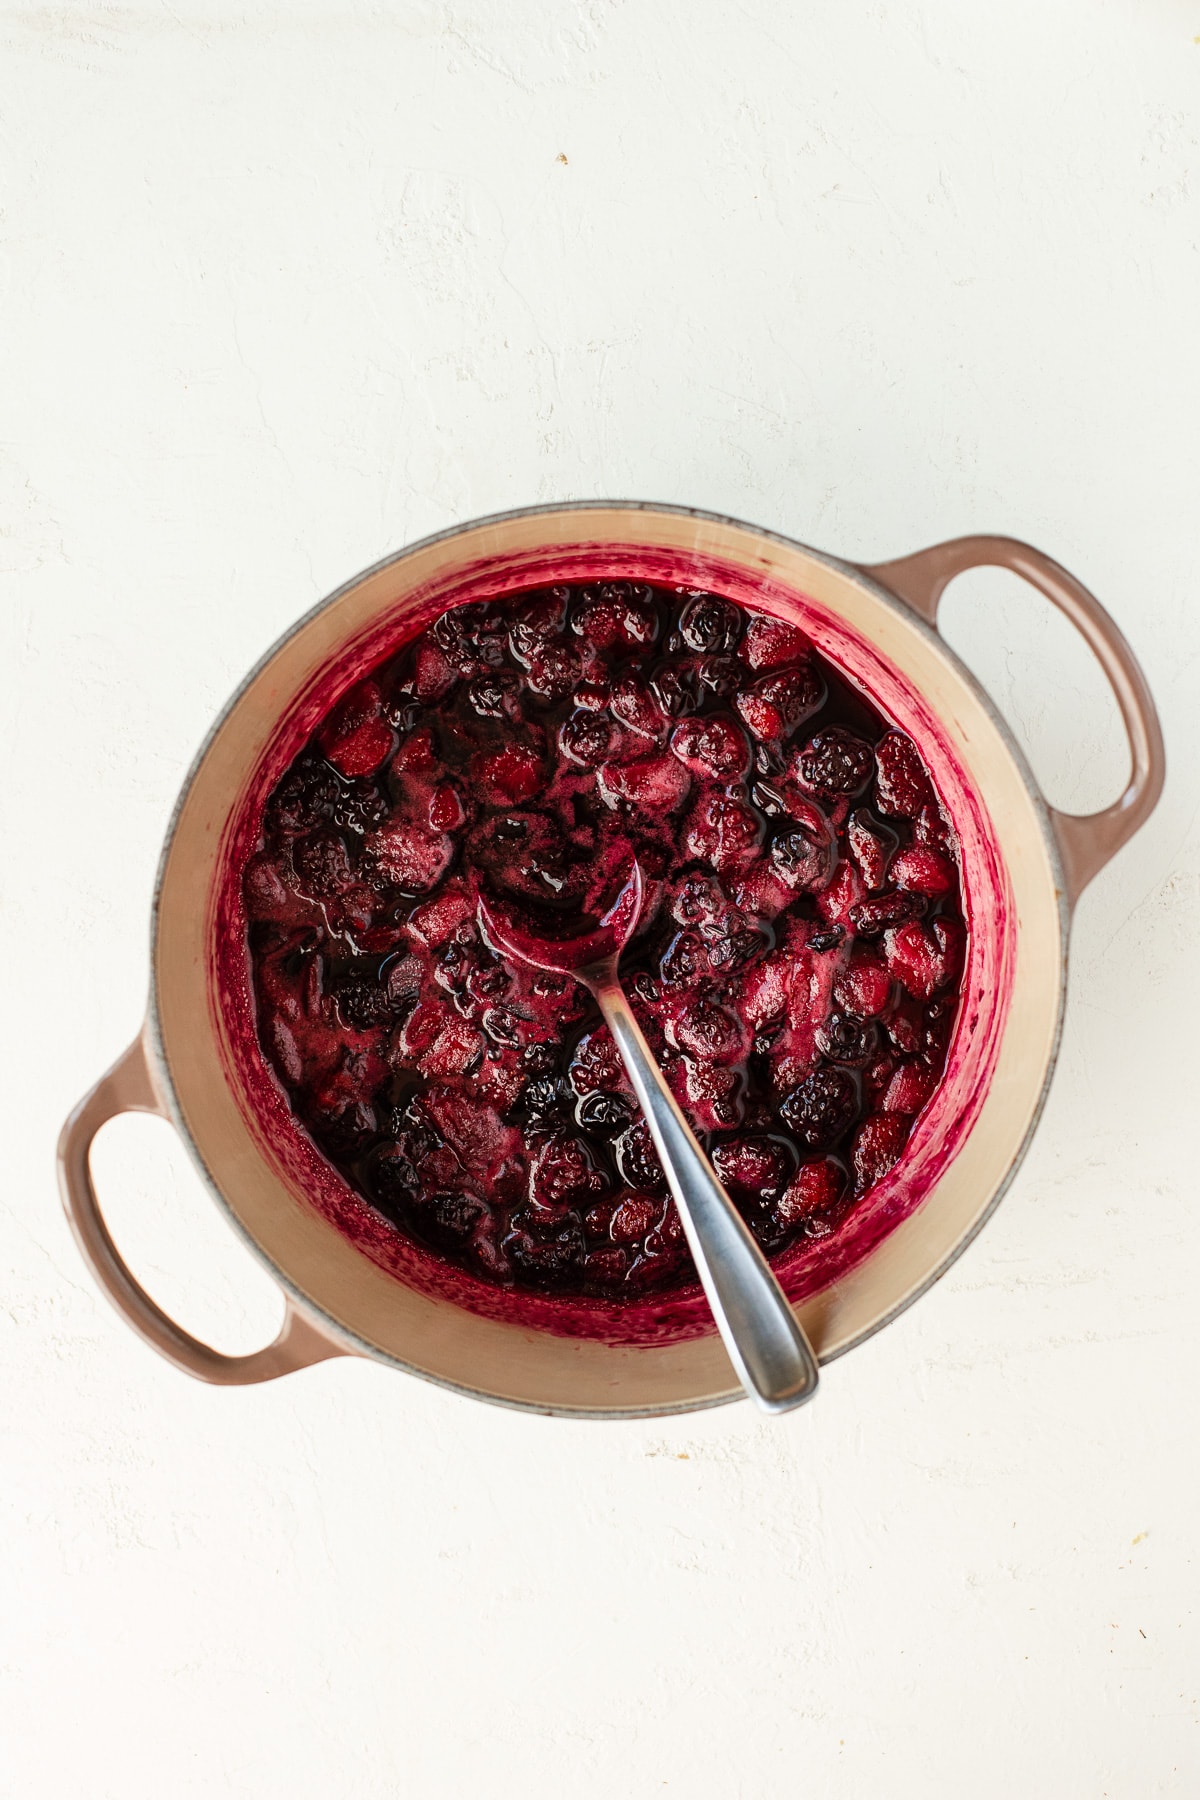
Step Three - Add the slurry. Slowly pour the slurry into the fruit mixture while stirring. Continue to let it cook - stirring constantly! - for about 30 seconds. It should be thick and jammy at this point, although it will continue to thicken more as it cools. Remove from heat and stir in the lemon zest and vanilla extract. Store in an airtight container (like a glass jar) in the refrigerator.
Common questions about fruit compote
When properly stored in the refrigerator, this mixed berry compote should keep for about two weeks.
No; compote doesn't have a high enough sugar content for canning.
The more corn starch you use, the thicker your compote will be, and vice versa. This recipe as written makes a fairly thick compote, similar to the consistency of jam.
Yes! Although this fruit compote taste great chilled, a warm berry compote can be the perfect addition to cheesecake, ice cream, or other desserts. I recommend reheating individual portions in the microwave, for 15-30 seconds.
More great ways to use this mixed berry compote!
Just like a charcuterie board, compote is incredibly versatile. Try using this chunky berry sauce for:
- Cake - especially pound cake!
- Crepes
- Vanilla Ice cream
- Waffles
- Chia Pudding
Have you made this recipe?
By adding your feedback or sharing this recipe with a friend, YOU help make this blog possible. You can leave a rating and review in the comments section below, or click any of the social icons on the left side of your screen to help spread the word. If you snapped a photo of your creation, tag me on Instagram (@brighteyedbaker) and I'll give you a shoutout in my story. And if you really like what you see, subscribe to get email notifications when new recipes are published!
Recipe Card

Mixed Berry Compote
Ingredients
- 7 tablespoons no sugar-added fruit juice divided use (I used blueberry pomegranate juice)
- 1 tablespoon corn starch
- 2 cups fresh or frozen berries chopped if large (I used equal parts strawberries, blackberries, and blueberries)
- 2 ½ tablespoons real maple syrup
- ½ teaspoon lemon zest
- ½ teaspoon vanilla extract
Instructions
- In a small bowl, stir or whisk together 1 tablespoon of fruit juice with corn starch to make a slurry, making sure the corn starch gets completely dissolved. Set aside.1 tablespoon corn starch
- Combine the remaining 6 tablespoons of juice, berries, and maple syrup in a medium saucepan set over medium heat and let simmer for about 5 minutes, stirring occasionally. The berries should start to soften and break down, and the mixture should be juicy.2 cups fresh or frozen berries |2 ½ tablespoons real maple syrup
- Slowly pour the slurry into the fruit mixture while stirring. Continue to let it cook - stirring constantly! - for about 30 seconds. It should be thick and jammy at this point, although it will continue to thicken more as it cools. Remove from heat and stir in the lemon zest and vanilla extract.½ teaspoon lemon zest |½ teaspoon vanilla extract
Notes
Ingredients and substitutions:
- Feel free to use any combination of berries for this compote. If using frozen berries instead of fresh, the compote may need to cook a bit longer to thicken due to the higher water content in frozen fruit.
- Honey or agave syrup can be used instead of maple syrup, although the flavor of the finished compote may vary slightly. Note that if this berry compote is made with honey, it will not be vegan.
Storing and Reheating:
- Store compote in an airtight container in the refrigerator. Keeps for about 2 weeks.
- Individual servings of fruit compote can be heated in the microwave for 15-30 seconds, or until warm.
Yield
- This recipe makes about 1 cup of compote.
Nutrition
Nutrition information is an estimate per serving, calculated using standard ingredients. Actual values may vary based on brands used, measurement methods, and more.


sandra
With less sugar than jams, you can use this with yogurt as well! MMM. A little can go a long way. Thanks!
Lexi
This fruit compote was SO easy to make and was perfect for using up leftover berries before they went bad. I love spreading it on bagels with a little cream cheese - so good!