Hey there. :) It's been a while, hasn't it?
Okay, so it's only been a week. But a week ago I blabbered on about Atlanta, and the week before that I gave you an easy-as-pie DIY Peanut Butter recipe. It's time to get back in gear, kick things up a notch, and talk real recipes again that require more than two ingredients. So today, I come bearing cake. I'm intentionally tempting you. Sorry?!
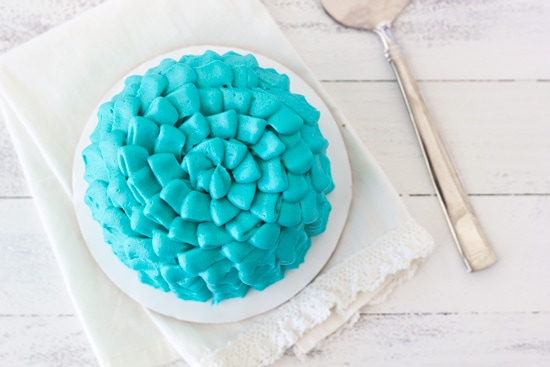
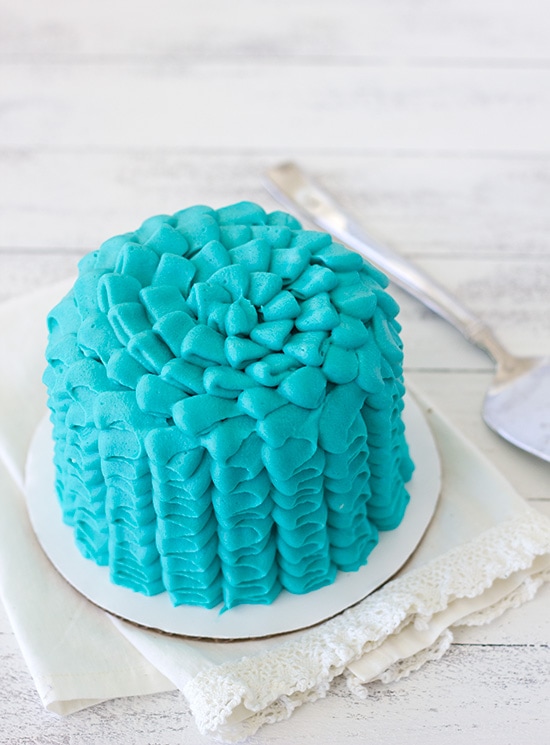
I love cake, it's true. I love making cakes. I love decorating cakes. I love eating cakes. And I love staring at the pretty teal ruffles on a cute little 4-inch cake. But here's the thing I honestly thought I'd never say: I kinda like white cake now! Actually, if it's this Vanilla Bean Cake, I definitley like it. I always despised white cake with every fiber of my being - or something like that - and now I'm telling you to make white cake. This is big.
So here's my story of how these cakes came to be:
I've wanted mini cake pans for a pretty long time now, and when I was asked to make mini cakes for a birthday last week, I finally had the excuse to buy my pans. If you've ever thought about buying some, DO IT! I'm totally smitten with mine and already feel like I'll be baking more cake now that I can make it in small portions. Anyway, I digress.. I made, per request, Mini Vanilla Bean Cakes with a Cream Cheese Frosting. And since I had a little extra batter, I tried something else I've been wanting to do for a while and made super-mini cupcake cakes with the extra. I'm now obsessed with mini cakes; they're so totally adorable!
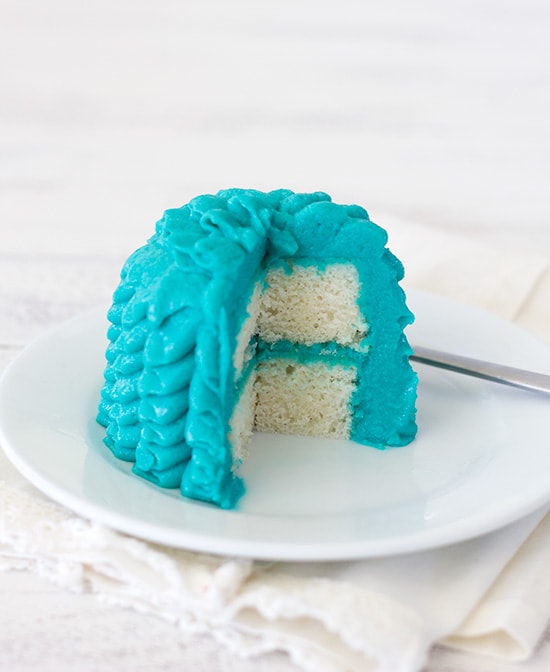
The Vanilla Bean Cake is sweet and tender, and it's got tons of vanilla flavor in it, a triple threat in fact - vanilla beans, vanilla sugar, and vanilla extract. I love the way it makes the cake more intriguing, and I like having the little specks of vanilla bean visible in each slice. The flavor of the cake alone is incredible, but since this is cake after all, frosting is necessary. I can't stand the pure sugariness of regular buttercream, but I'm a total sucker for Cream Cheese Frosting, and it was the perfect match for this cake. This version is sweet but well-balanced with the tang of cream cheese, so it still tastes light. A little fancy (but actually really easy) piping work to put it all together, and you've got yourself some super cute and dangerously delicious Mini Ruffle Cakes. LOVE.
A few notes:
The recipe for the cake is in weight measurements. After scaling down the original recipe, the volume measurements would have been a little wonky, so they aren't included. I highly recommend measuring your ingredients by weight rather than volume anyway, but if you're determined to try the recipe and can't get your hands on a kitchen scale, get in touch with me and I can try to help you out with the volume measurements.
The cakes do dome in the oven, which means you have to do some slicing to flatten out the layers, but the cake has enough structure to make slicing a breeze. Plus, you get to eat all the scraps, which is a big bonus!
PrintMini Vanilla Bean Ruffle Cakes
These moist and tender Vanilla Bean Cakes are frosted with a sweet Cream Cheese Frosting in an adorable ruffle design.
- Yield: one double layer 4-inch cake and 2 double layer cupcake cakes 1x
Ingredients
Vanilla Bean Cake
- 192 grams (6 ¾ ounces) all-purpose flour
- 9 grams (2 teaspoons) baking powder
- 2 grams (scant ½ teaspoon) salt
- 4 ounces unsalted butter, room temperature
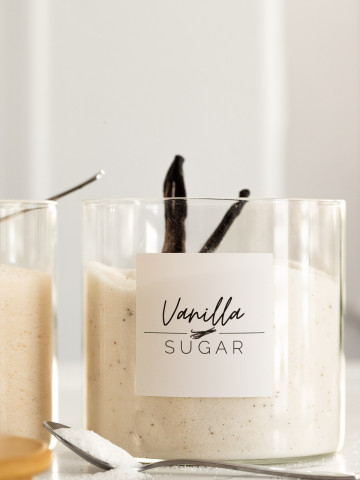
- 180 grams (6 ⅜ ounces) vanilla sugar (or granulated sugar)
- ½ vanilla bean, split and scraped
- 3 egg whites, room temperature
- 5 ⅝ ounces buttermilk (preferably full-fat), room temperature
- ½ teaspoon vanilla extract
Cream Cheese Buttercream*
- 8 ounces (1 cup or 2 sticks) unsalted butter, softened and cut into tablespoons
- 8 ounces cream cheese, softened
- 16 ounces (4 cups) confectioner's sugar
- 1 teaspoon vanilla extract
- pinch salt
- gel icing color (optional, I used Wilton's Teal Icing Color)
Instructions
Vanilla Bean Cake
- Preheat oven to 350ºF. Butter two 4 by 2 inch round cake pans, line bottoms with parchment rounds, and dust with flour, tapping out excess. Spray four cups in a standard muffin tin with non-stick cooking spray.
- Sift the flour, baking powder, and salt into a bowl and whisk together.
- In the bowl of a stand mixer fitted with the paddle attachment, cream together the butter, sugar, and vanilla bean seeds on medium-high speed until light, fluffy, and smooth. Reduce the speed to medium and add the egg whites one at a time, beating each in until well-incorporated into the mixture. Wipe down the bowl and beater as needed.
- Mix the vanilla extract into the buttermilk.
- With the mixer on lowest speed, add the dry ingredients and the buttermilk mixture in thirds, alternating between each. Begin and end with the dry ingredients. Wipe down the bowl and beater as needed during this process and mix just until all ingredients are evenly incorporated.
- Divide the batter between the two mini cake pans to fill each about halfway,and divide the remaining batter between the four greased muffin cups. Smooth out the tops.
- Bake in the preheated oven for 18-20 minutes (cupcakes) and 30-35 minutes (cakes), until a toothpick inserted into the center of each comes out clean. Allow the cakes to cool in pans on a wire rack for 10 minutes, and then remove from pans, peel off parchment, and cool on wire rack completely. Cool cupakes in the muffin tin for about 10 minutes, and then transfer to wire rack to cool completely (your may need to loosen the edges with something like a small offset spatula to get them out of the pan). Once cakes and cupcakes have cooled, wrap each tightly in plastic wrap. Freeze in a zip-top bag in the freezer for thirty minutes prior to decorating.*
Cream Cheese Frosting
- In the bowl of a stand mixer fitted with the whip attachment, beat butter and cream cheese together on medium-high speed until smooth, wiping down the bowl and beater as needed. With the mixer on low speed, gradually add the powdered sugar. Once it is all incorporated, increase the mixer speed to medium-high again and beat until smooth and creamy, again wiping down bowl and beater as needed. Beat in vanilla extract and salt. Use a spatula to gradually mix in icing color (if desired), until you're happy with the color.
Assembly
- For the 4-inch cakes:* Remove cakes from the freezer and use a large serrated knife to slice the domed tops off of each one. Place one cake sliced-side down on a cake round or serving plate of choice***. Use an offset spatula to spread a thin layer of frosting over the top, and set the second cake on top, sliced-side up. Spread a thin layer of frosting (crumb coat) around the outside of the cake to seal in the crumbs and the frosting in the middle. Place in the refrigerator (covered if possible****) to chill for 30 minutes. Keep remaining frosting in the refrigerator until ready to use.
- Use a long, thin skewer (like a metal cake tester) to make vertical lines around the side of the cake, about ½" apart, or however wide you'd like your ruffles to be. (This step is optional, but I find it really helpful to guide you as you pipe the ruffles). Fit a pastry bag with a petal tip (such as Wilton 104 ) and fill with frosting. Starting at the base of the cake with the pastry bag held at a 45º angle - so that the flat part of the piping tip is perpendicular to the cake - pipe ruffles up the sides of the cake using a consistent left and right motion. End each ruffle in the same direction, piping slightly over the top of the cake. Pipe ruffles around the top of the cake, starting at the outermost part and working circularly inwards. To do this, the piping tip should be in line with the top surface of the cake. The motion for piping the top ruffles is fairly similar to the sides, but instead of working upwards, you'll gradually move the piping time sideways.
- Chill cake in the refrigerator until the ruffles have set and until ready to serve. If not serving immediatley, the cake should be stored in a cake keeper. Store leftovers in an airtight container in the refrigerator. Cake is best eaten the same day it is assembled.
- For cupcake cakes: Remove cupcakes from freezer and slice the domed tops off. Place bottom-up and use a 2-inch round cookie cutter to cut through the center of each cupcake, removing the slanted sides. Arrange 2 cupcakes bottom-up on separate cake rounds or serving plates. Spread tops with a thin layer of frosting and place a second cupcake, bottom-down, on top of each. Add crumb coat. Chill for 30 minutes (again, covered if possible).
- Proceed with decorating cupcake cakes just as you did for the 4-inch cake. You may want to make your ruffles less wide than the ruffles for the larger cake. Once decorated, chill until set, and then serve. Store in an airtight container in the refrigerator.
Notes
*You should have the perfect amount of frosting for all three cakes, so if you're one to dip your finger in the frosting and sample as you go... DON'T! Or just make extra. :)
**Don't pull the cakes/cupcakes out of the freezer until you're totally ready to start working with them; the idea is for them to be more firm for the slicing and crumb coat.
***It's helpful to set your cake round or plate on a rotating cake stand for decorating. For the 4-inch cake, it also helps to cut four strips of parchment to arrange in a square under your cake, covering the area where the edges of the cake touch the round/plate. Leave these strips there while you apply the crumb coat, and then remove before piping the ruffles.
****I have a cake caddy that I put the cakes in while they were in the fridge to keep the air out. Don't use anything that will touch your frosting and ruin it, of course!
Vanilla Bean Cake adapted from Sweetapolita
Cream Cheese Buttercream from I Heart Baking
Cakes inspired by 52 Kitchen Adventures
Ruffling technique adapted from various internet sources, including Martha Stewart and this My Sweet and Saucy video


Carole says
Hi Alexandra, today I'm collecting cake recipes. Please drop me a line on ca4ole@gmail.com if you are ok with me linking to your post in my blog (Carole's Chatter). Cheers
sora says
Beautiful!!! Can't wait to see Ethan's cake = ). I should have had you make my wedding cake.
alexandra says
Thanks! I was actually meaning to show you one of these photos. :)
Yii-Huei says
Love your decorating, the ruffles look gorgeous, especially with the colour. I also really like the little flecks of vanilla bean in your photos :)
alexandra says
Thank you so much! I love those vanilla bean specks too. :)
Ashley says
Okay this is adorable! And now I want to make a cake just so I can try the ruffled frosting... and I do love vanilla bean cake : )
alexandra says
Haha thanks! You should invest in some mini cake pans... or just make a cupcake cake. But seriously, the 4" cake pans are the way to go... all the fun of cake without all the leftovers tempting you. :)
Elaine says
I love the color of that cake! wish I can frost like that too! awesome job :)
alexandra says
Thanks Elaine! The frosting is actually really easy; you should give it a go!
Belinda @themoonblushbaker says
You are so good at decorating cakes! the theme of blue and white very pretty. I always use a scale, so when I have adapt one in us metrics it is so confusing. Thanks for using scale amounts this time!
alexandra says
Thanks so much Belinda! I always use a scale too, so I know how confusing it can be to figure out weight measurements from volume ones. I would push for everyone to start using scales. :)
Rosie @ Blueberry Kitchen says
Your cake looks amazing, I love your ruffle frosting!
alexandra says
Aww, thank you so much!
Laura (Tutti Dolci) says
Love the ruffles, very cute!
alexandra says
Thanks Laura!