• Skip to primary navigation
  • Skip to main content
  • Skip to primary sidebar
  • Skip to footer
  • Recipes
  • About
  • Contact
  • Portfolio
  • Subscribe

Bright-Eyed Baker

menu icon
go to homepage
  • Recipes
  • About Me
  • Contact Me
  • Portfolio
  • Subscribe
    • Email
    • Facebook
    • Instagram
    • Pinterest
    • Twitter
  • subscribe
    search icon
    Homepage link
    • Recipes
    • About Me
    • Contact Me
    • Portfolio
    • Subscribe
    • Email
    • Facebook
    • Instagram
    • Pinterest
    • Twitter
  • ×

    Home » Recipes » DIY & How-Tos

    Published: Oct 23, 2012 · Modified: Aug 6, 2017 by alexandra · This post may contain affiliate links

    How to Toast Nuts

    Jump to Recipe

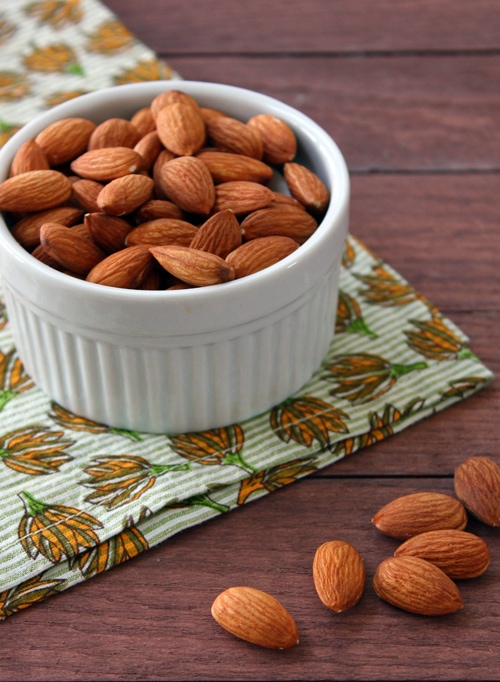
    Toasting nuts seems like it should be so simple that it's not worthy of an explanation, but if you've never done it before, you might not be sure just how it's done. I say this because not that long ago, I was one of those people who felt like I should know how to toast nuts, but didn't. And in fact, a few different times that I tried left me wondering if it was really worth it. Finally, I found a method that works for me (which is still one of the simplest methods out there) and I see the light!! Toasting nuts brings out a lot of flavor in them, which is a good thing whether you just want to snack on them or you're adding them to a recipe. Now that I've figured this out, I'll probably be toasting nuts for a lot of my recipes, so I thought some of you might find a little how-to for this helpful. Right now, I'm only giving the times for toasting walnuts and pecans, because these are the nuts I've tried toasting with this method.As I try toasting other nuts, I'll add the appropriate times for them to this page.

    Print

    How to Toast Nuts

    Print Recipe
    Pin Recipe

    A simple how-to for toasting nuts to bring out the best in their flavor!

    Ingredients

    • Nut of choice
    • Almonds - 10-15 minutes
    • Pecans - 10-15 minutes
    • *Times are approximate as ovens may vary.

    Instructions

    1. Preheat oven to 350 F. Line a baking sheet with parchment paper, and lay the nuts out in a single layer on top. Bake in the preheated oven for the appropriate amount of time depending on the nut you are using.
    2. Nuts are done when they smell toasted and fragrant. (You may not smell them until you open the oven door).*
    3. Allow nuts to cool for at least 5 minutes before eating or incorporating into a recipe.

    Notes

    *It's a good idea to keep an eye on nuts while toasting to make sure none of them are browning too much. A burning smell means stop!

    Have you made this recipe?

    Tag @brighteyedbaker on Instagram and hashtag it #brighteyedbaker

    Digiprove sealCopyright protected by Digiprove © 2012-2014

    More DIY & how-to recipes

    • DIY: Candied Lemon Peel
    • DIY: Cinnamon Baking Chips (gluten-free, vegan option)
    • DIY: Homemade Cranberry Orange Sauce {gluten-free, vegan}
    • Pumpkin Cream Cold Brew (DIY Starbucks Recipe!)

    Reader Interactions

    Comments

      Did you make this recipe? Let me know! Cancel reply

      Your email address will not be published. Required fields are marked *

      Recipe rating ★☆ ★☆ ★☆ ★☆ ★☆

      This site uses Akismet to reduce spam. Learn how your comment data is processed.

    1. Laura (Tutti Dolci) says

      October 23, 2012 at 1:57 pm

      Toasted nuts are such a great snack!

      Reply
      • alexandra says

        October 25, 2012 at 5:53 pm

        True! The hardest part about toasting some for a recipe is making sure they last long enough to go in the recipe. ;)

        Reply

    Primary Sidebar

    about-me

    Hey There! Thanks for stopping by! Here's what you can expect to find on Bright-Eyed Baker: lots of baked goods and other sweets made from scratch (many of which are gluten-free), plus the occasional savory recipe or mixed drink. My goal is to show you that from-scratch baking - gluten-free or not! - doesn't have to be intimidating. Learn more about me.

    • Email
    • Facebook
    • Instagram
    • Pinterest
    • Twitter
    • DIY: Caramel sauce with milk (no butter, no cream)
    • How to Cut Parchment Paper Rounds for Cake
    • Easy caramel iced coffee
    • DIY: Brown Sugar Candied Walnuts {gluten-free}
    • DIY: Homemade Bailey's Irish Cream
    • DIY: Candied orange peel {gluten-free}
    • Espresso powder and how to make it
    • How to make buttermilk
    seasonal favorites icon
    EASTER RECIPES
    • Blackberry Mint Mimosa
    • Simple and Moist Carrot Bundt Cake (gluten-free option)
    • The Mimosa Mojito
    • Strawberry Oatmeal Crumb Bars (gluten-free option, dairy-free)
    • Strawberry Layer Cake {gluten-free}
    • Best Summer Mixed Berry Galette (gluten-free option)
    • Raisin Cinnamon Rolls with Cream Cheese Frosting
    • Glazed Lemon Poppy Seed Muffins {gluten-free option}

    Footer

    Footer

    ^ back to top

    About

    • Privacy Policy
    • Disclaimer
    • Terms & Conditions
    • Accessibility

    Newsletter

    • Sign Up! for emails and updates

    Contact

    • Contact
    • FAQ

    As an Amazon Associate I earn from qualifying purchases.

    Copyright © 2022 Brunch Pro on the Brunch Pro Theme